When working with spatial data in tools like HEC-RAS, GIS software, or mapping libraries, converting latitude/longitude coordinates (EPSG:4326, WGS 84) to a projected coordinate system such as UTM is common. This requires obtaining the correct projection file (.prj), because without it, the Google imagery simply won’t shown. The projection file is akin to the reference that tells the software where your site is located.
This document outlines the step-by-step process for determining your UTM zone and getting the necessary projection file.
Start with Your Coordinates #
Begn with your location in decimal degrees, typically from GPS or a mapping tool. For example:
Latitude: 14.6
Longitude: 105.0
These coordinates are expressed in the EPSG:4326 geographic coordinate system (WGS 84 datum).
Determine Your UTM Zone and EPSG Code #
UTM divides the globe into 60 zones, each 6° of longitude wide. To use projected coordinates, you need to find the correct UTM zone and corresponding EPSG code.
Option A: Manual Calculation #
- Calculate the UTM zone number using:
Zone = floor((longitude + 180) / 6) + 1
For example:
Zone = floor((105 + 180) / 6) + 48 - Determine the hemisphere prefix for the EPSG code:
- Northern Hemisphere (latitude ≥ 0): EPSG codes start with 326
- Southern Hemisphere (latitude < 0): EPSG codes start with 327
Since Latitude = 14.6 is in the Northern Hemisphere, the EPSG code is:EPSG: 32648
Option B: Use the UTM Zone Map Tool (No Calculation Required) #
You can skip manual calculations by using an interactive map tool:
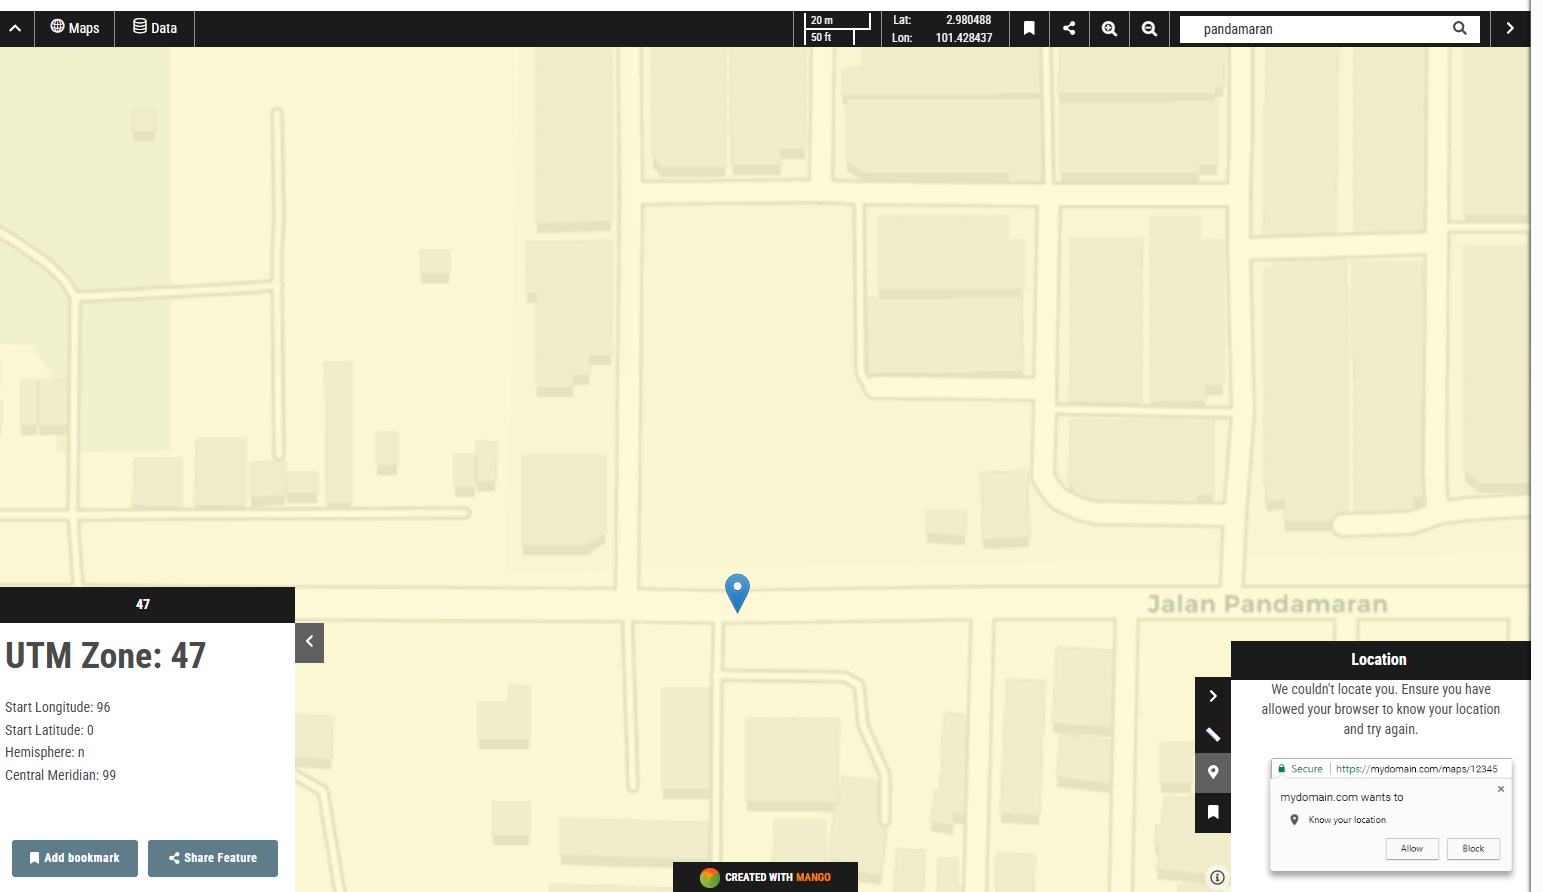
- Open the UTM Zone Map Tool
- Type in your location and press enter at the search bar
For the example location (Pandamaran), the popup shows UTM Zone: 47

This gives you the exact EPSG code to use. So in this case, the EPSG code is 32647
Additional Tools for UTM Zone Lookup #
You may use the below resources to get the UTM Zone of your location.
- EPSG.io: Enter coordinates and receive suggested projected CRS and EPSG codes.
- Desktop GIS software like QGIS can also identify UTM zones automatically when loading coordinate data.
Obtain the .prj file #
Then, based on the EPSG, (e.g., EPSG:32648), download the matching projection file:
- Visit https://spatialreference.org.
- Search for the EPSG code (e.g., 32648).
- Select the matching result, such as:
WGS 84 / UTM zone 48N (EPSG:32648) - Scroll to the Formats section.
- Download the .prj file or copy its contents.
- This is an example of .prj file:
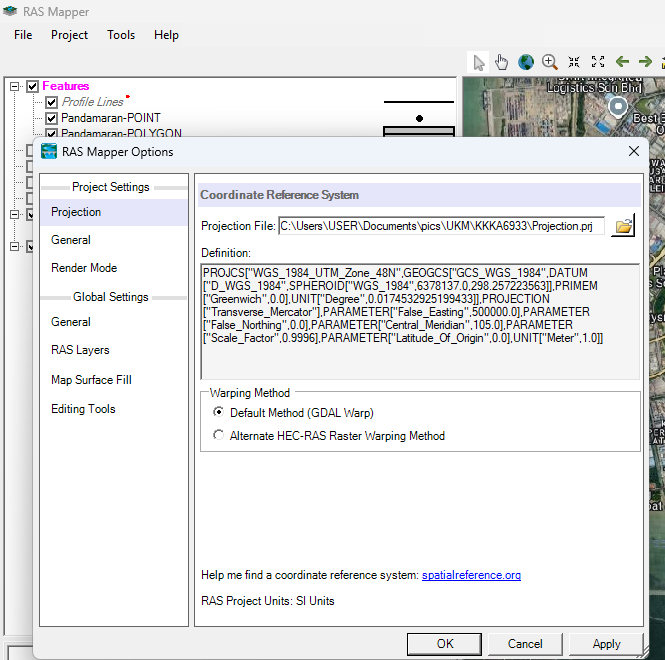
PROJCS["WGS_1984_UTM_Zone_48N",GEOGCS["GCS_WGS_1984",DATUM["D_WGS_1984",SPHEROID["WGS_1984",6378137.0,298.257223563]],PRIMEM["Greenwich",0.0],UNIT["Degree",0.0174532925199433]],PROJECTION["Transverse_Mercator"],PARAMETER["False_Easting",500000.0],PARAMETER["False_Northing",0.0],PARAMETER["Central_Meridian",105.0],PARAMETER["Scale_Factor",0.9996],PARAMETER["Latitude_Of_Origin",0.0],UNIT["Meter",1.0]]Use the Projection File #
Place the .prj file alongside your spatial data files (e.g., .shp, .shx, .dbf). GIS software will automatically recognize and apply the projection.
For Hec Ras, you will have to specifically apply the .prj file at RAS Mapper->Project->Projection

Summary Workflow #
| Step | Action | Tool/Resource |
|---|---|---|
| 1 | Identify your coordinates (lat/lon) | GPS, Google Earth, etc. |
| 2 | Determine UTM zone and EPSG code | Manual calculation or UTM Zone Map Tool or EPSG.io |
| 3 | Download .prj file | spatialreference.org |
| 4 | Apply projection in GIS/HEC-RAS | GIS software (QGIS, ArcGIS) or HEC-RAS |
Coming up next #
After obtaining our projection, we will show you how to import Google Earth imagery to Hec Ras for hydrological modelling. Stay tuned!


