Motivation #
This article is written for those who want to integrate Google Earth imagery and terrain data into your HEC-RAS projects, providing a comprehensive visual background for your hydraulic models.
Preparing Your Geographic Data #
Begin by precisely defining your area of interest within Google Earth Web or Pro. Delineate the project boundary using its polygon or path tools, then export this area as a KML or KMZ file. This KML file contains the geographic coordinates of your defined boundary; it serves more like “tracing“ in your project and identify important place marks for you to place your links or junctions.
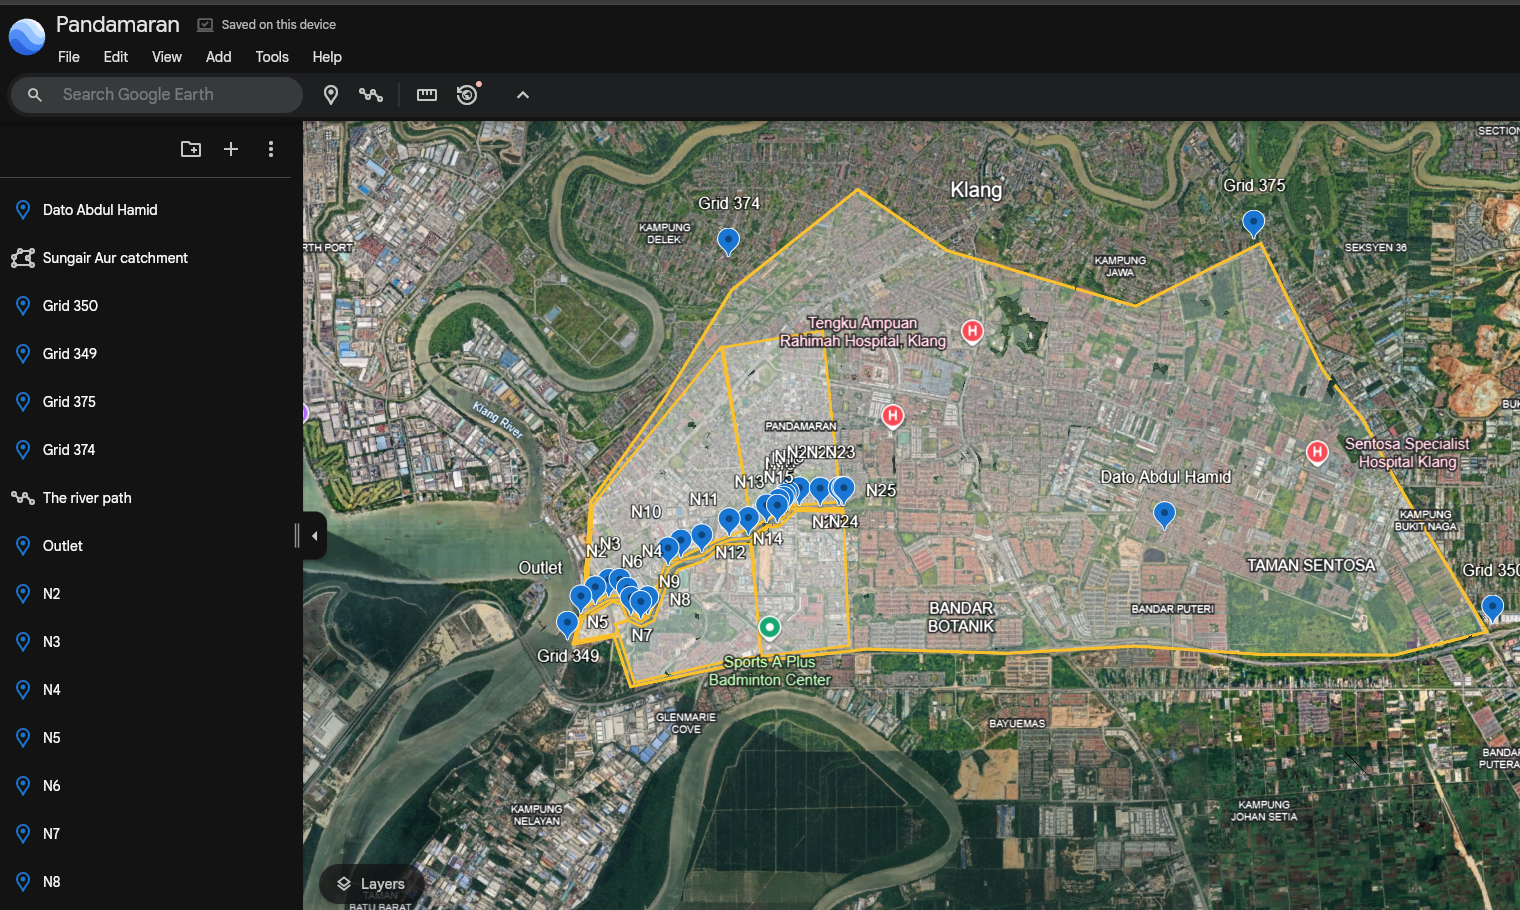
Next, convert this KML file into a Shapefile, a format compatible with HEC-RAS. You can use online or offline tools. Online tools include https://products.aspose.app/gis/conversion/kml-to-shp or https://kmz2shp.com/. Upload your KML file, initiate the conversion, and then download the resulting Shapefile. Remember that a Shapefile comprises multiple associated files (e.g., .shp, .shx, .dbf, .prj), often provided together in a .zip archive; ensure all components are downloaded. For our purpose, it’s the `Point` and the `Polygon` shape files that really matter.
Setting Up HEC-RAS Mapper #
With your geographic data prepared, open HEC-RAS and launch RAS Mapper. The first critical step here is to set the projection for your project. Accurate projection is paramount for data alignment; comprehensive guidance on this can be found at here.
ALOS PALSAR dataset #
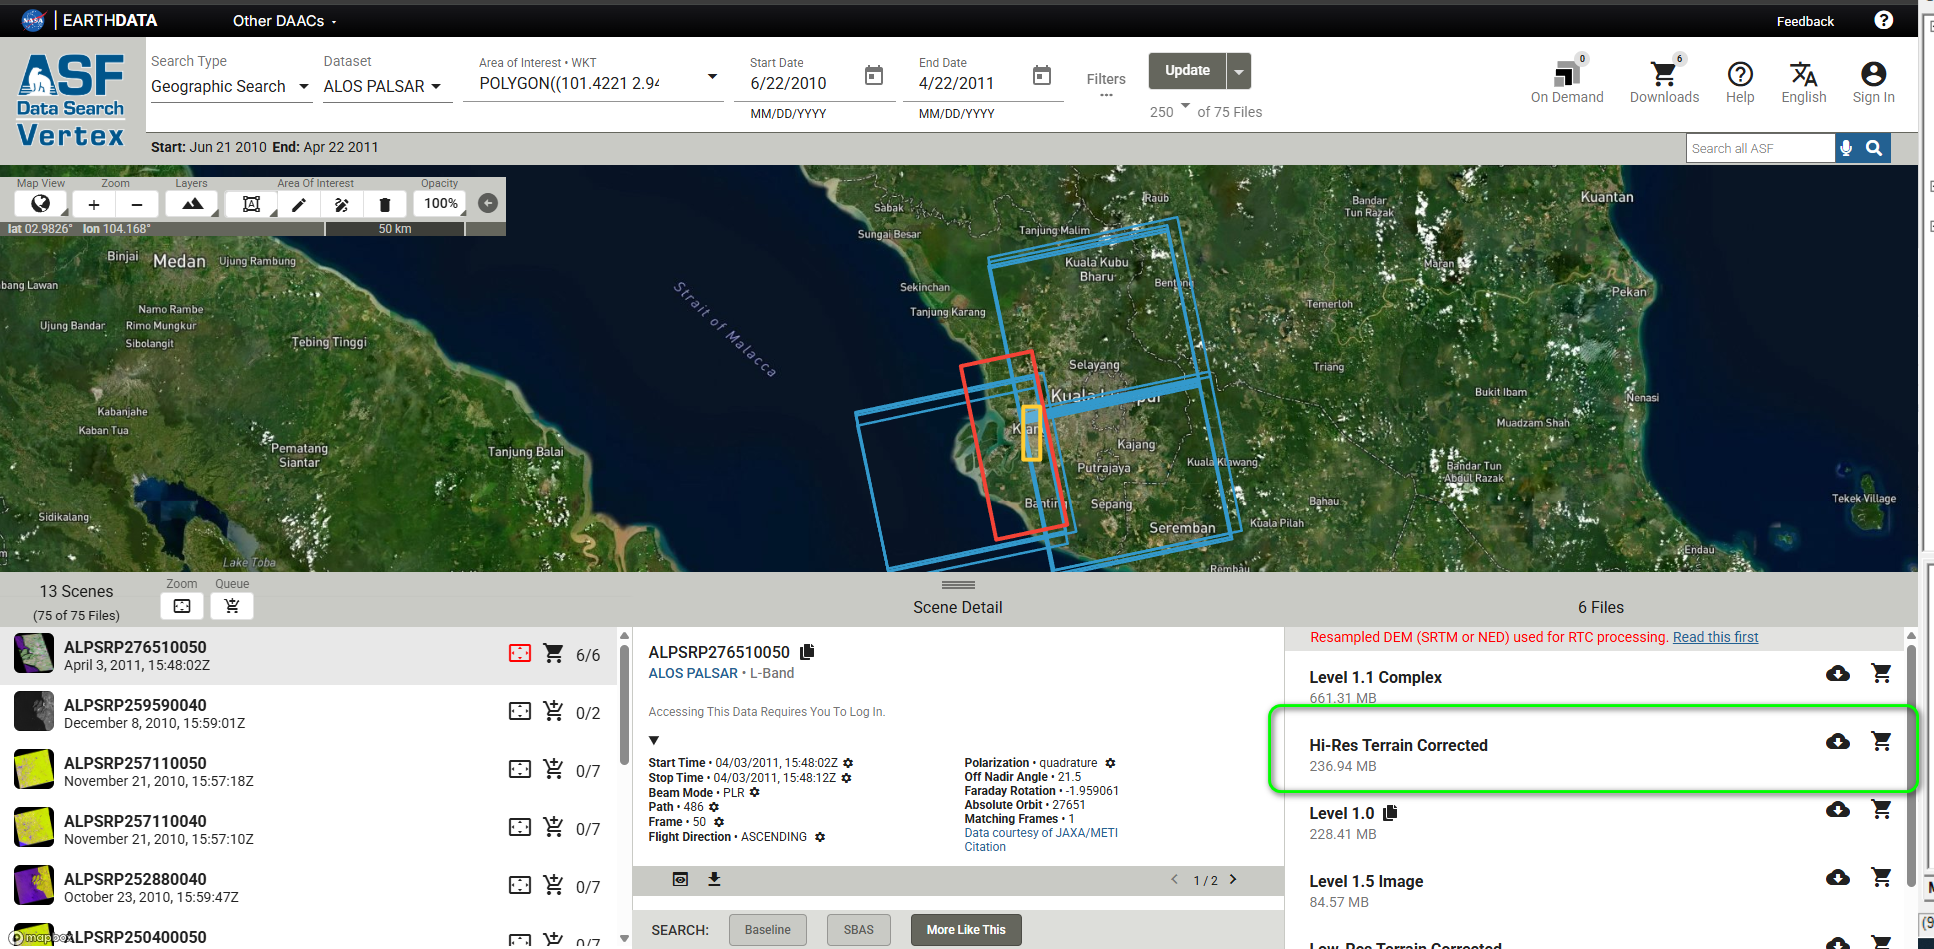
Simultaneously, acquire the necessary terrain data for your site. Navigate to https://search.asf.alaska.edu/#/, specify the date and select the “ALOS PALSAR” dataset. Locate your project site on the interactive map and download the pertinent dataset(s), which will arrive as a .zip file containing a Digital Elevation Model (DEM) with a *.dem.tif extension.
Import RAS Terrain #
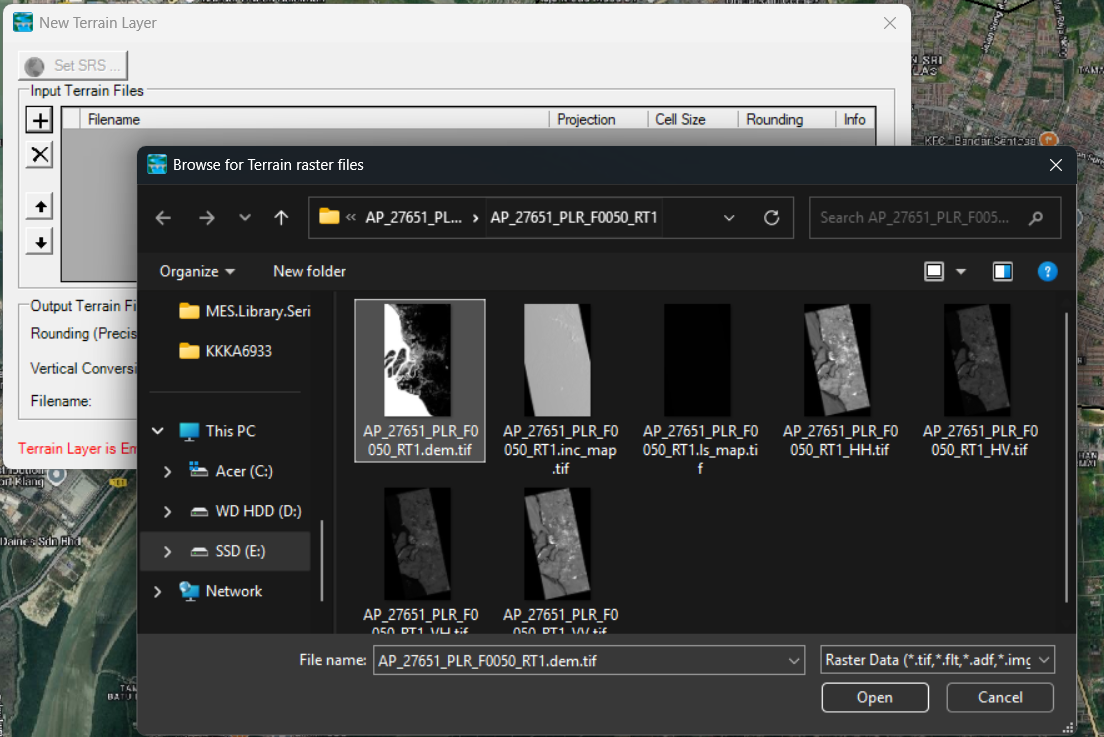
Once downloaded, return to RAS Mapper, select Terrain -> Create a new RAS terrain, and import the *.dem.tif file as your new terrain layer.
Google Hybrid web imagery #
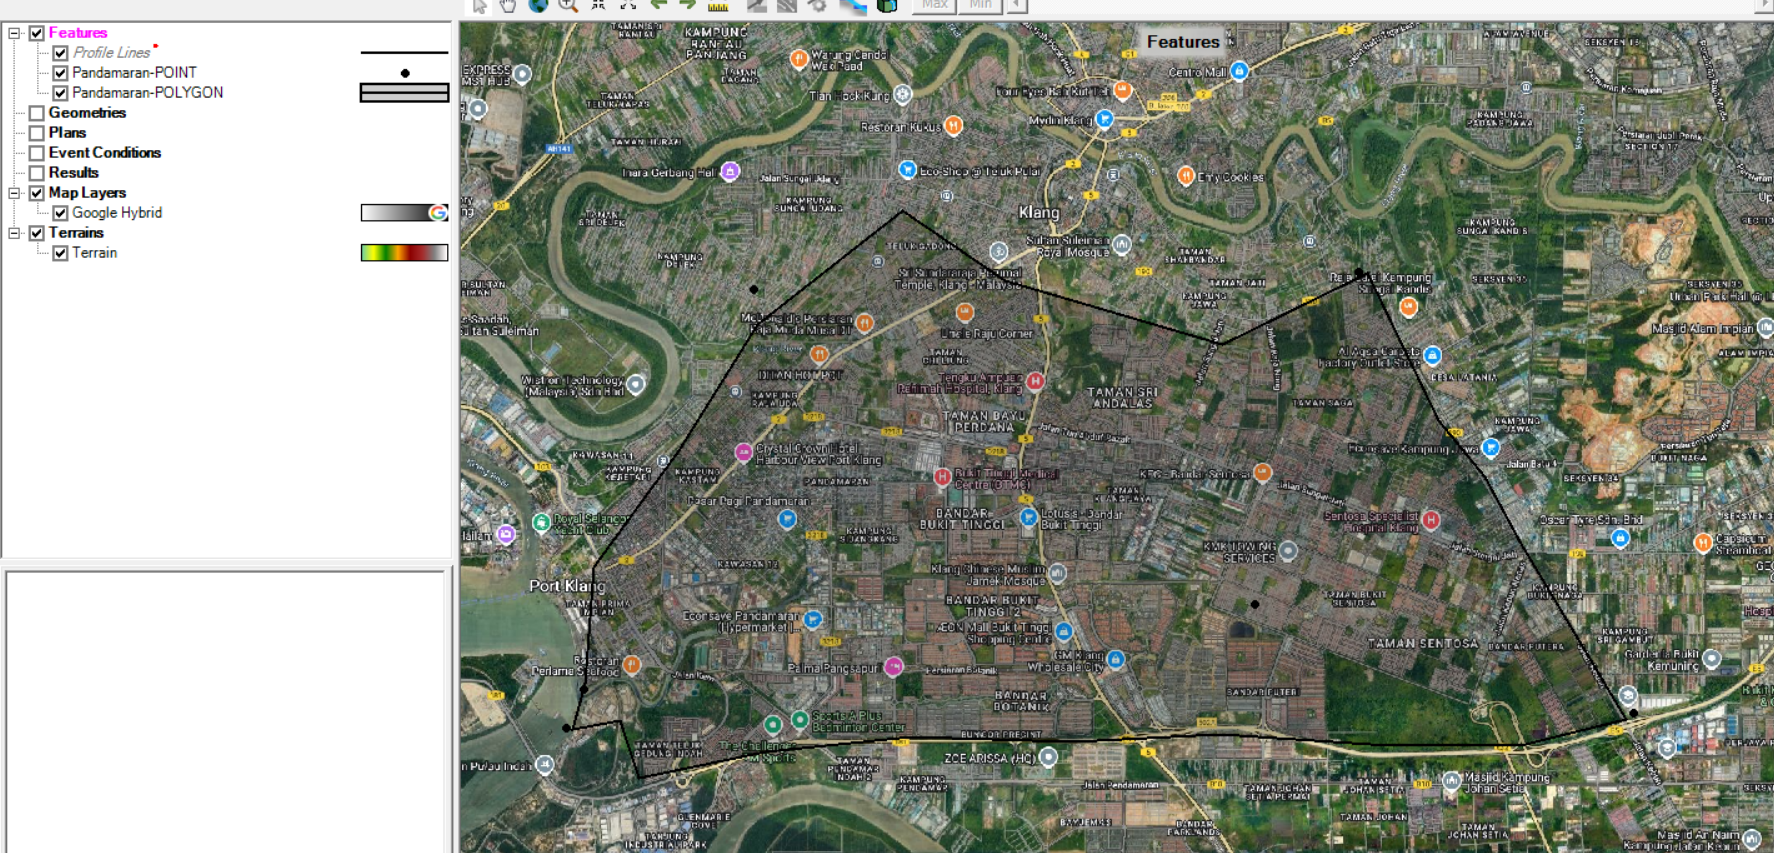
To integrate the visual background, go to Map Layers->Add Web Imagery within RAS Mapper and choose Google Hybrid. This adds a dynamic satellite and map overlay.
Add Point and Polygon Shape overlay #
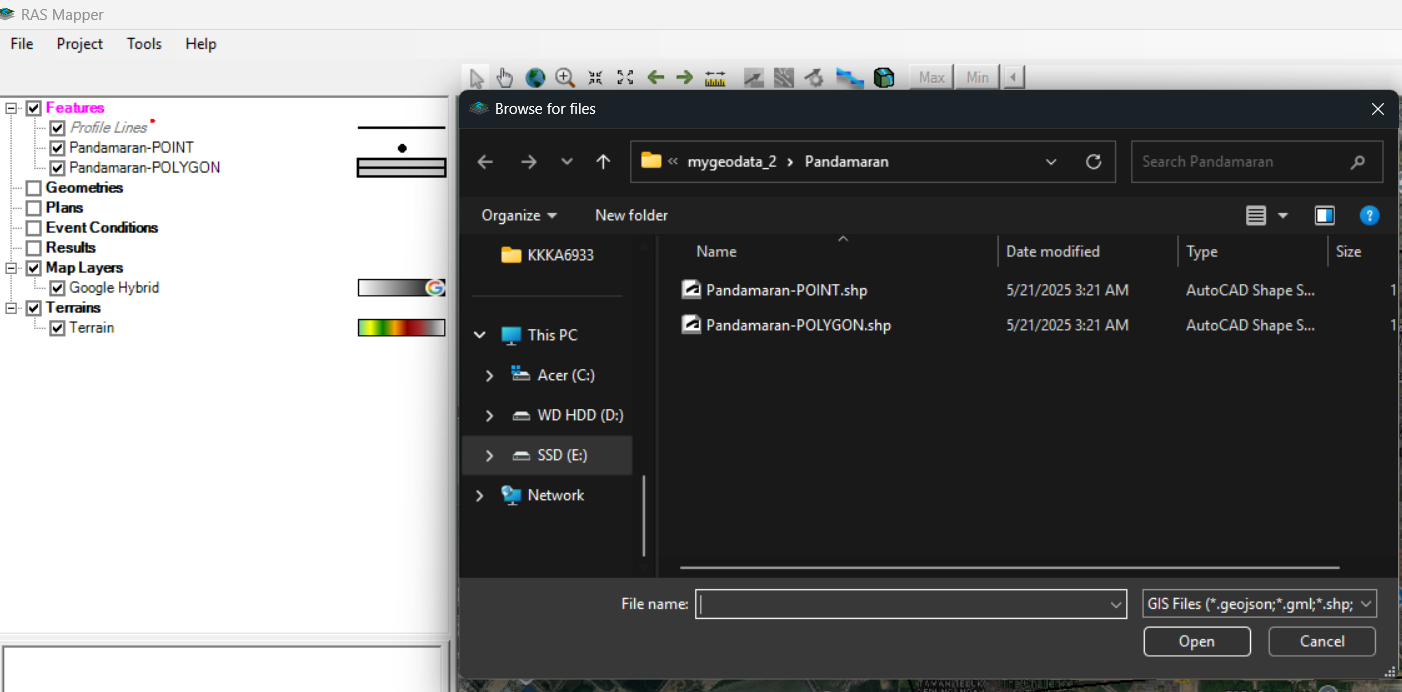
Finally, bring in your delineated boundary by navigating to Features -> Add Existing Layer, and select the .shp file you converted earlier, the Point and Polygon Layer in this case.

Verifying Alignment #
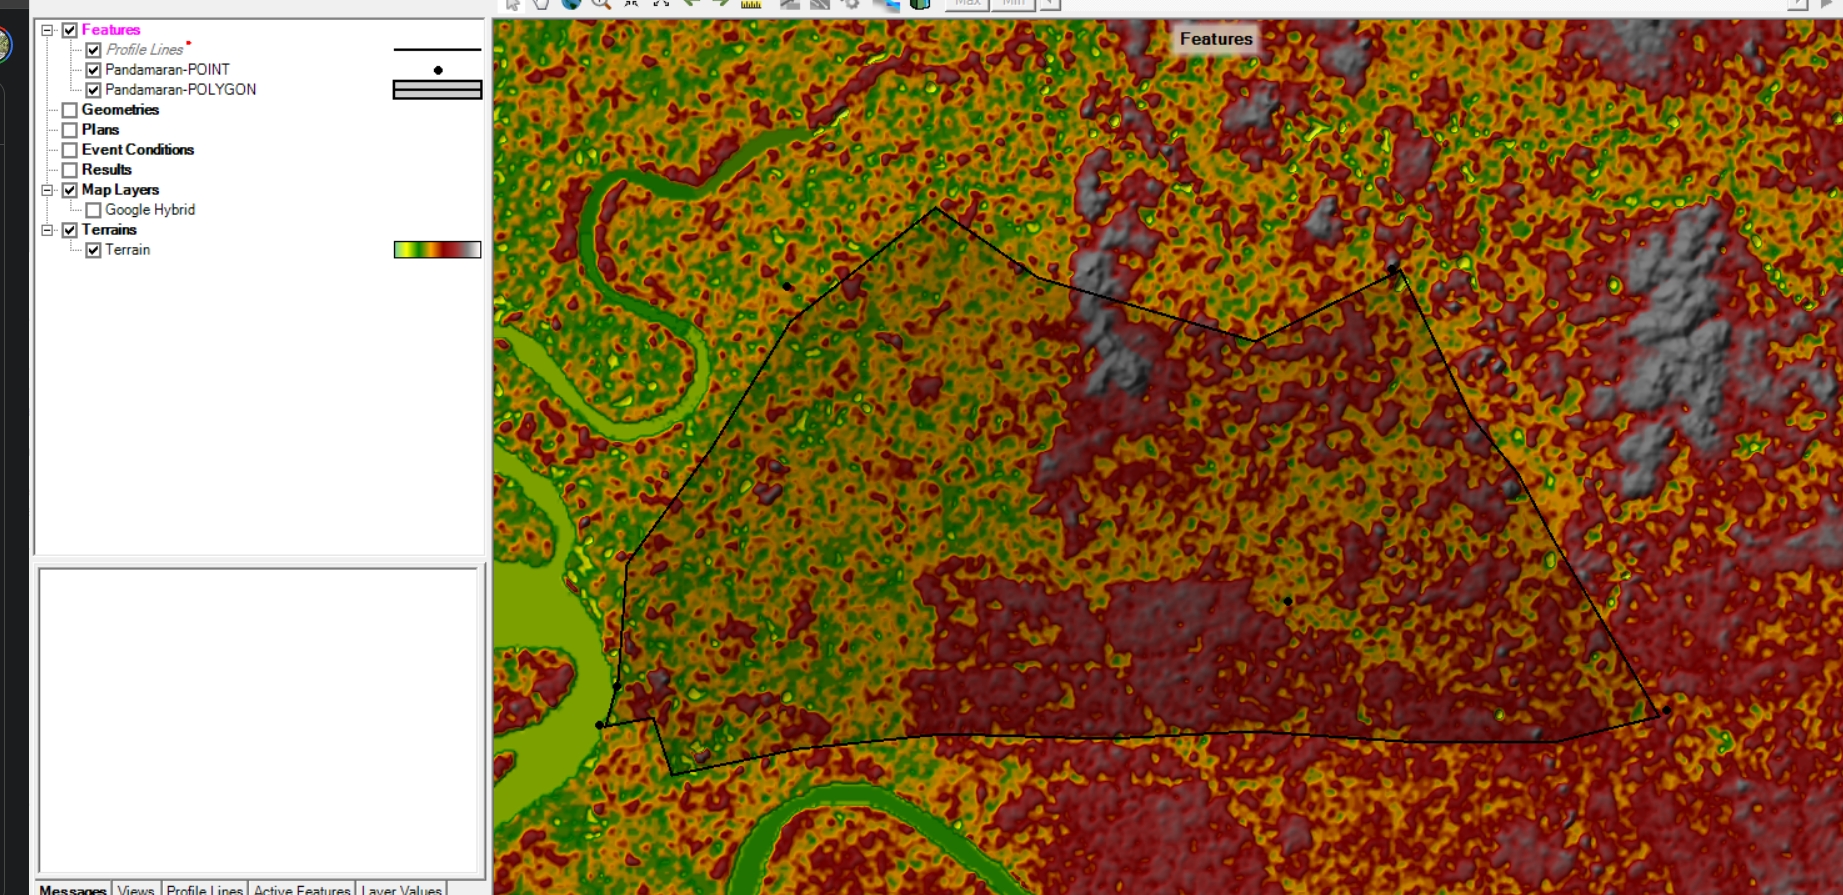
A crucial final step is a sanity check. Toggle the visibility of the Google Hybrid layer on and off within RAS Mapper. You should be able to verify that your imported terrain aligns perfectly with both the Google Hybrid Map Layers and your converted Shapefile boundary, as shown in the below two images.

