Motivation #
In Civil 3D, you may want to know, for a given profile, at a particular given Station, what the Elevation is exactly.
Profile vs. Profile View #
Before we tackle this question, we need to explore a critical aspect of Civil 3D design: a Profile is different from a Profile View.
A Profile essentially looks at an Alignment not from the top, but from the side. Therefore, it provides information on the Stations and the corresponding Elevations. It is just the data attached to the alignment, with no mention of the representation of the data.
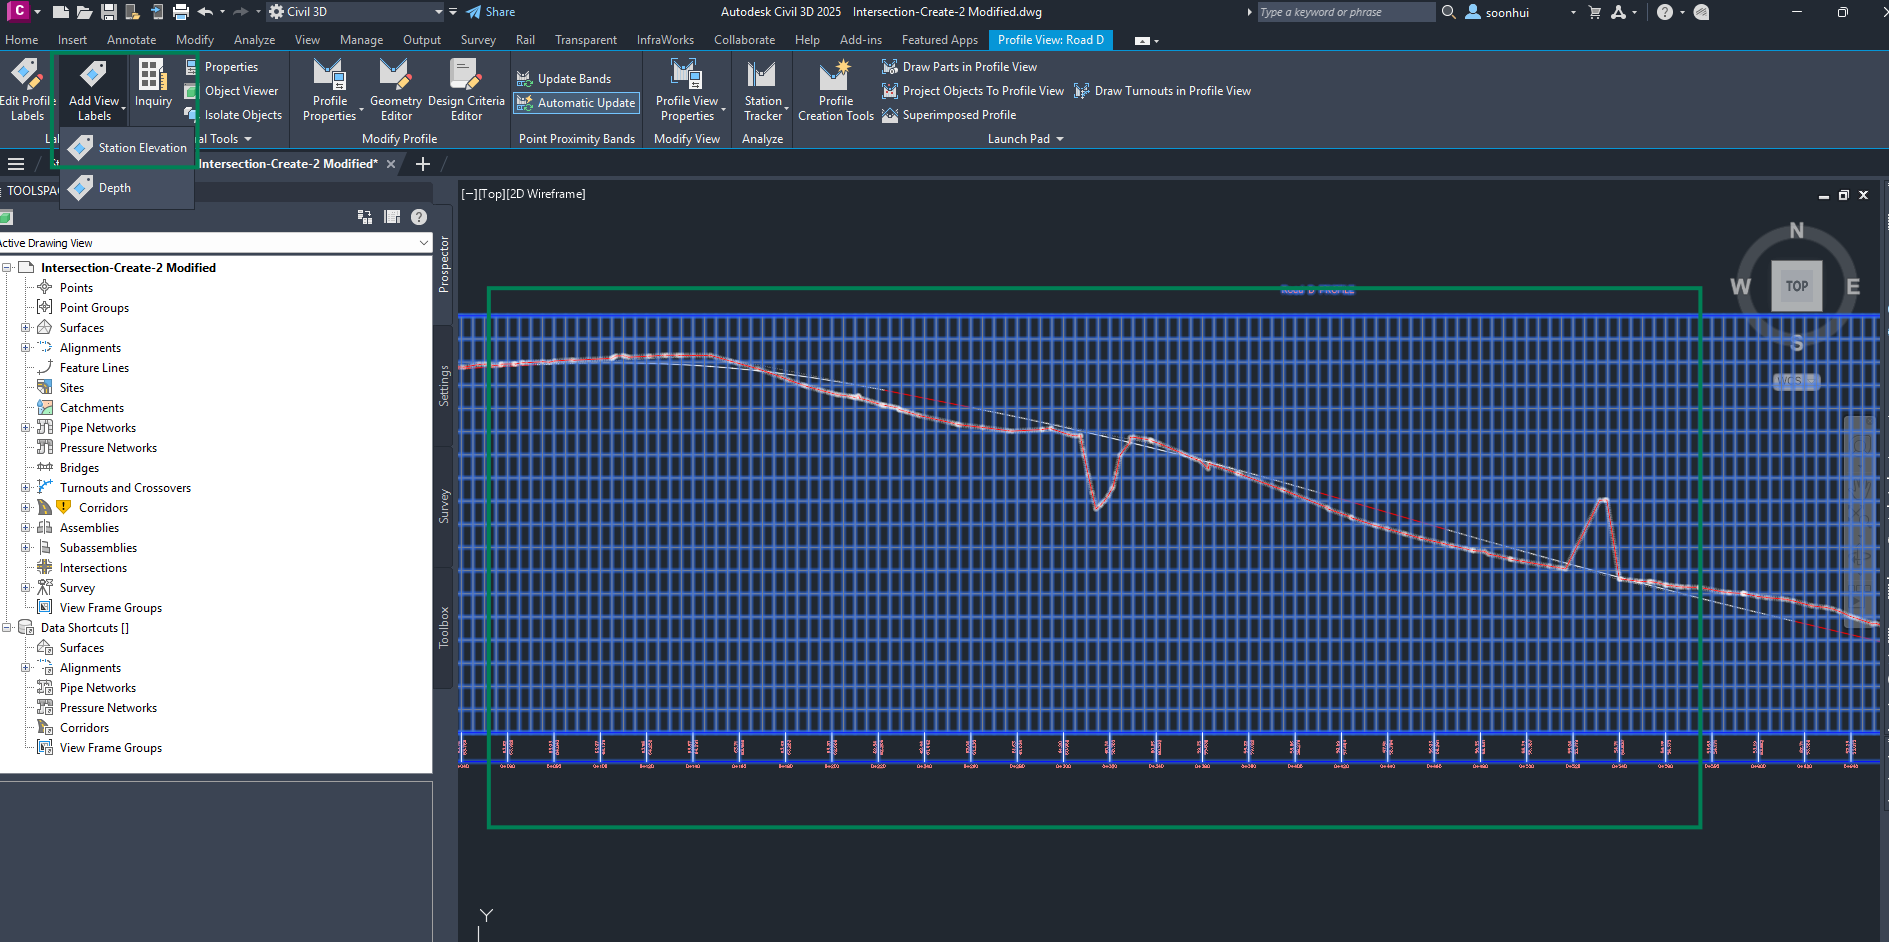
A Profile View, on the other hand, is the representation of the Profile (or many Profiles) in graphical form, almost always in the form of a graph, as shown below:

You can stack multiple Station vs. Elevation relationships in a single Profile View for ease of comparison. Like the above screenshot, the Ground level Elevation is plotted together with Road D Elevation.
How to annotate the elevation, given a station? #
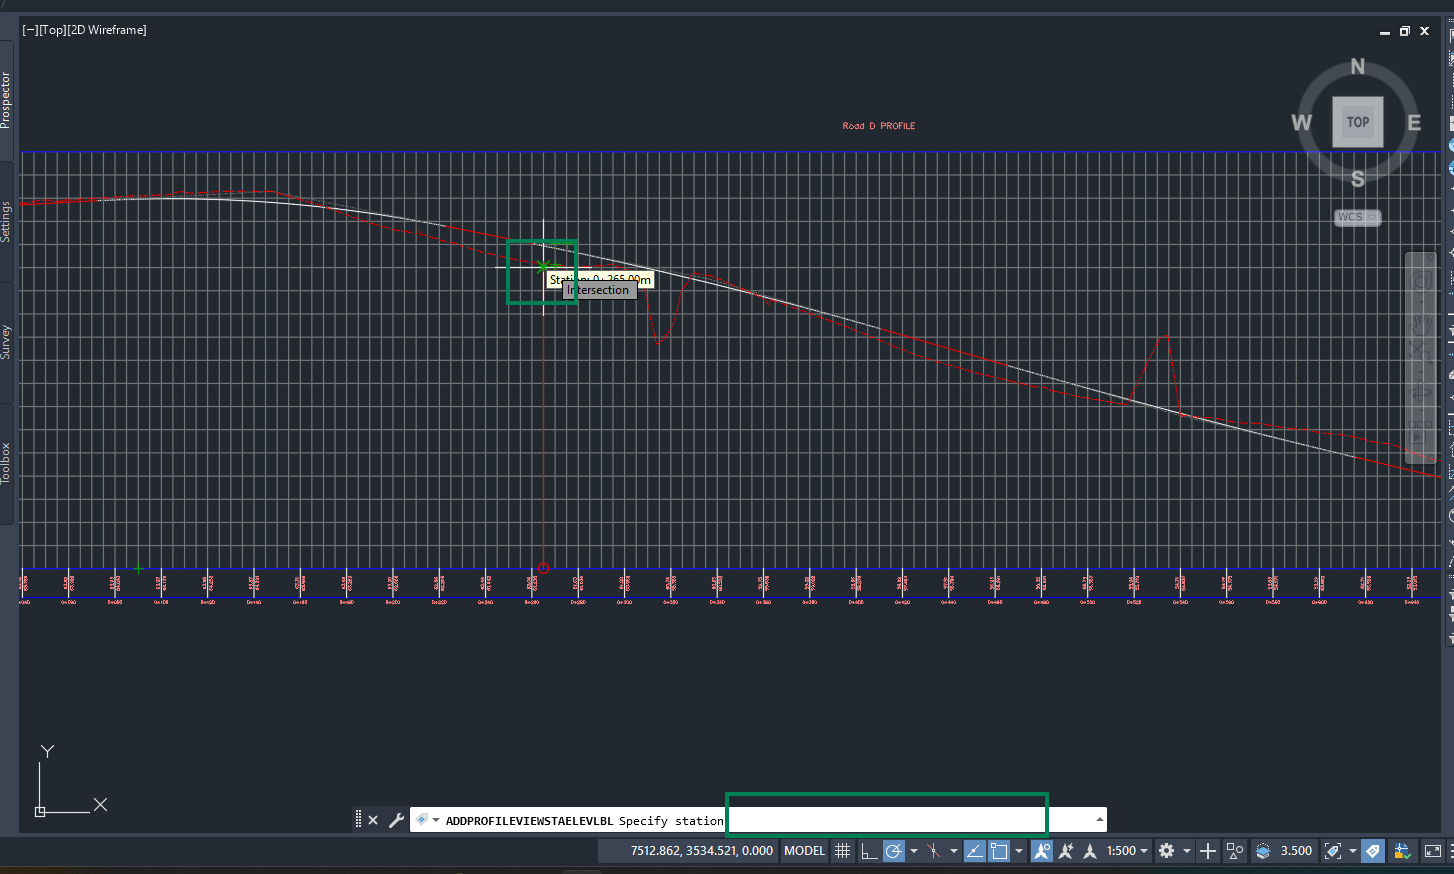
First, click on the related Profile View. In the Profile View Ribbon context menu, click on Add View Labels, Station Elevation.

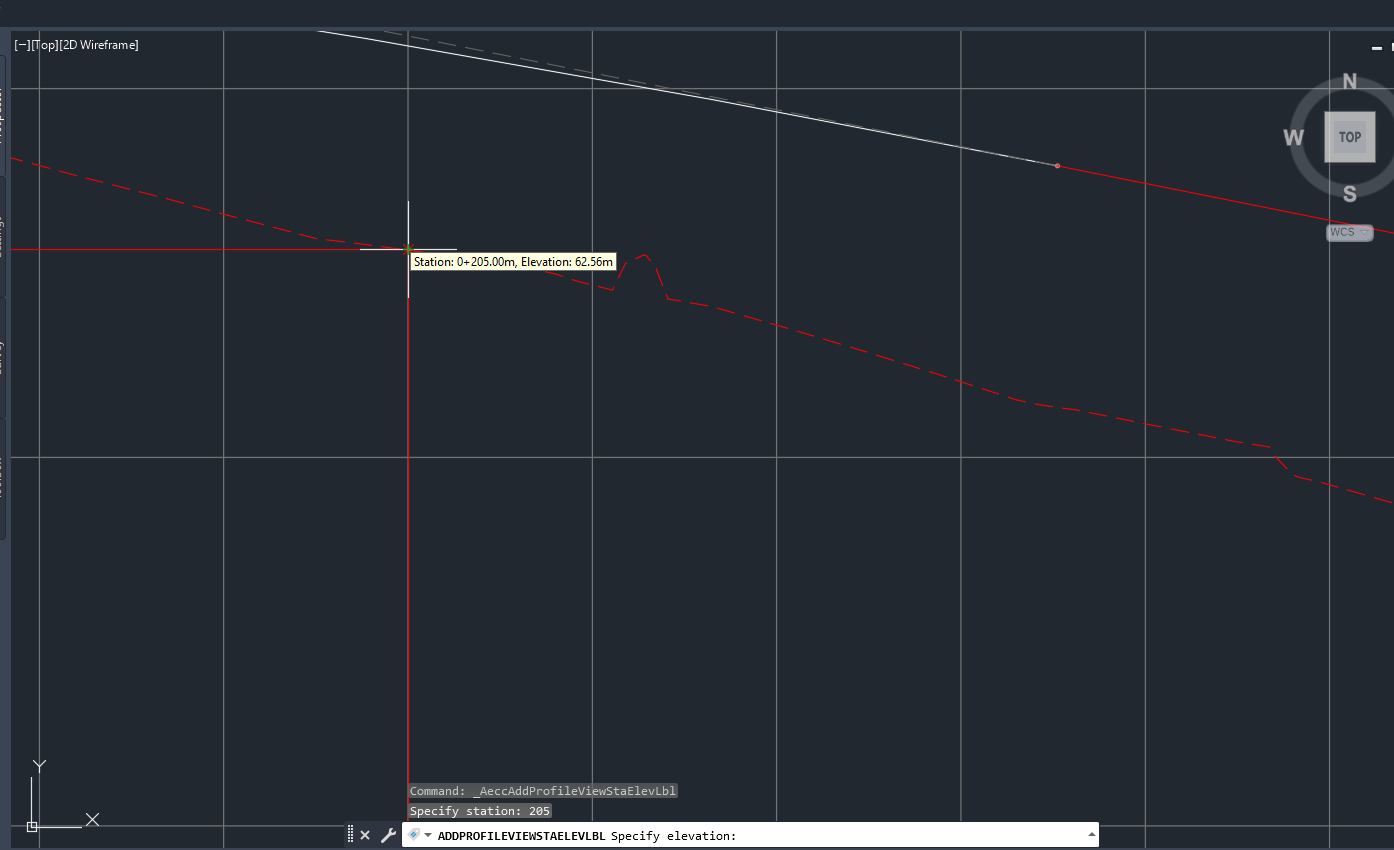
Then, specify the station you want to get the elevation for. You can either click on the point of the station you want, or you can use the command line to specify an exact station, as shown below:

Then, move your mouse cursor over the point where you want to obtain a station, or key in the command line the station you want. You can mouse hover the straight line to get a real-time display of the elevation.

The related profile point allows you to snap to it, and if you do, an annotation label will appear, as shown below:

The Inquiry Tools #
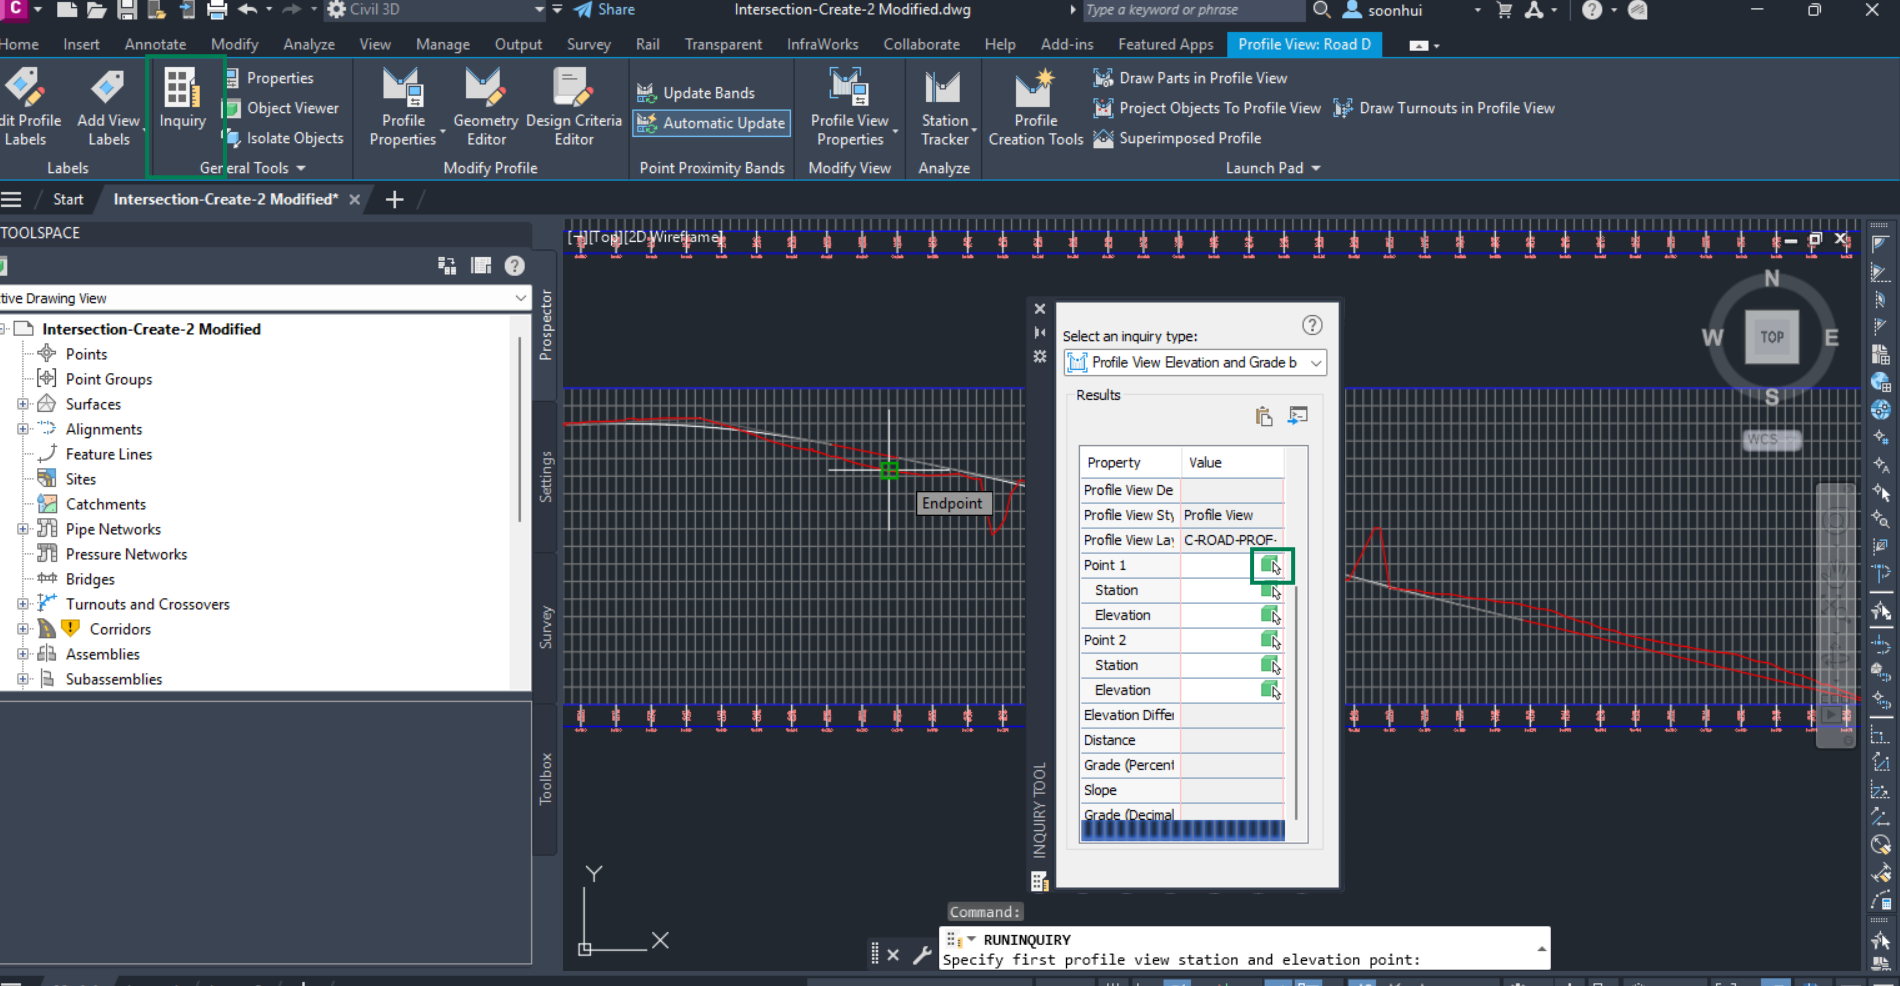
Another way to get the Elevation is to use the Inquiry Tools. You can access it via the Analyze tab, but for our purpose, we still access it via the Profile View Ribbon context menu after clicking on a Profile View.

Then, in the dialog box, click on the button beside Point 1, and select the point for which you want to get the station and elevation, as shown above.


