Motivation #
Setting the pressure network catalog for a drawing differs from setting the gravity network catalog, primarily because the gravity network catalog is set on a per-machine basis, whereas the pressure network catalog is set on a per-Parts List basis. This is an important distinction to keep in mind.
Set the Default Pressure Catalog for New Parts List #
From our experience, setting the pressure network catalog via the command line Home tab -> Create Design panel -> Set Pressure Network Catalog (as shown below)
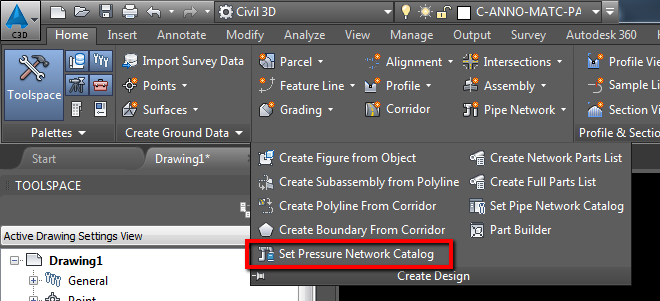
or using the SETPRESSURENETWORKCATALOG command does not work.
To be more specific, it only works when you want to assign a default Pressure Part Catalog when you are creating a new Parts List. But as shown below, pressure network can support multiple part catalogs, so this diminishes somewhat the need to set a first and default catalog.
To do this via C# code, refer to here
Add in multiple Catalogs on a Parts List #
To add in more Pressure Network Catalogs ( Pressure Network supports multiple catalogs), you must do it on a Parts List basis.
- Navigate to Toolspace -> Settings -> Pressure Network -> Standard Parts List.
- Right-click and choose Edit….
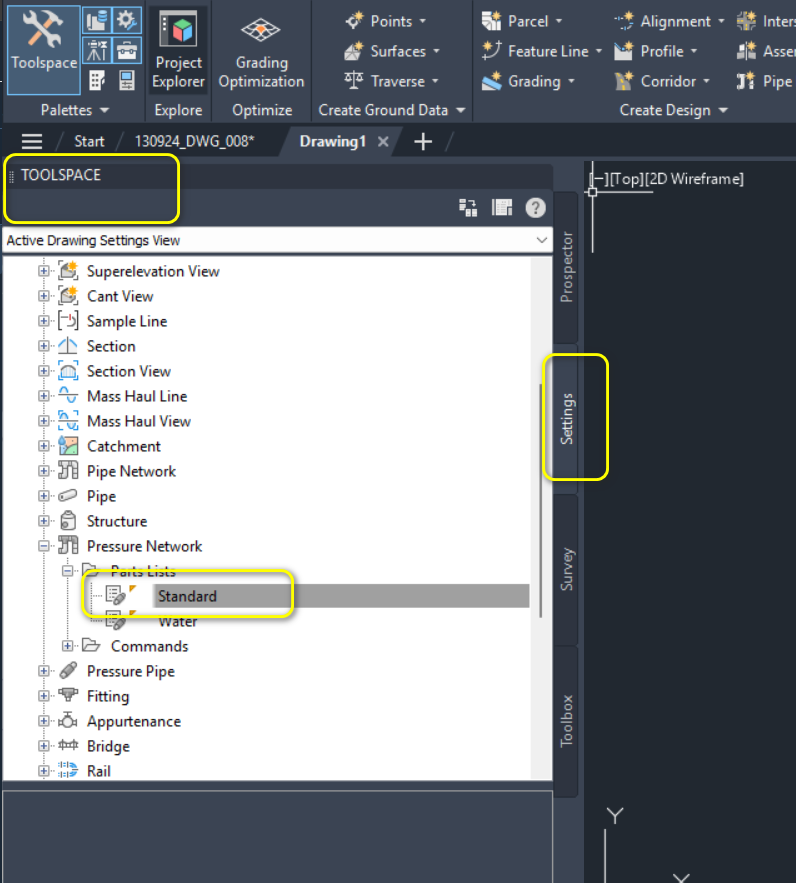
- Click Load New Catalog and choose an
.sqlitefile from the catalog path.
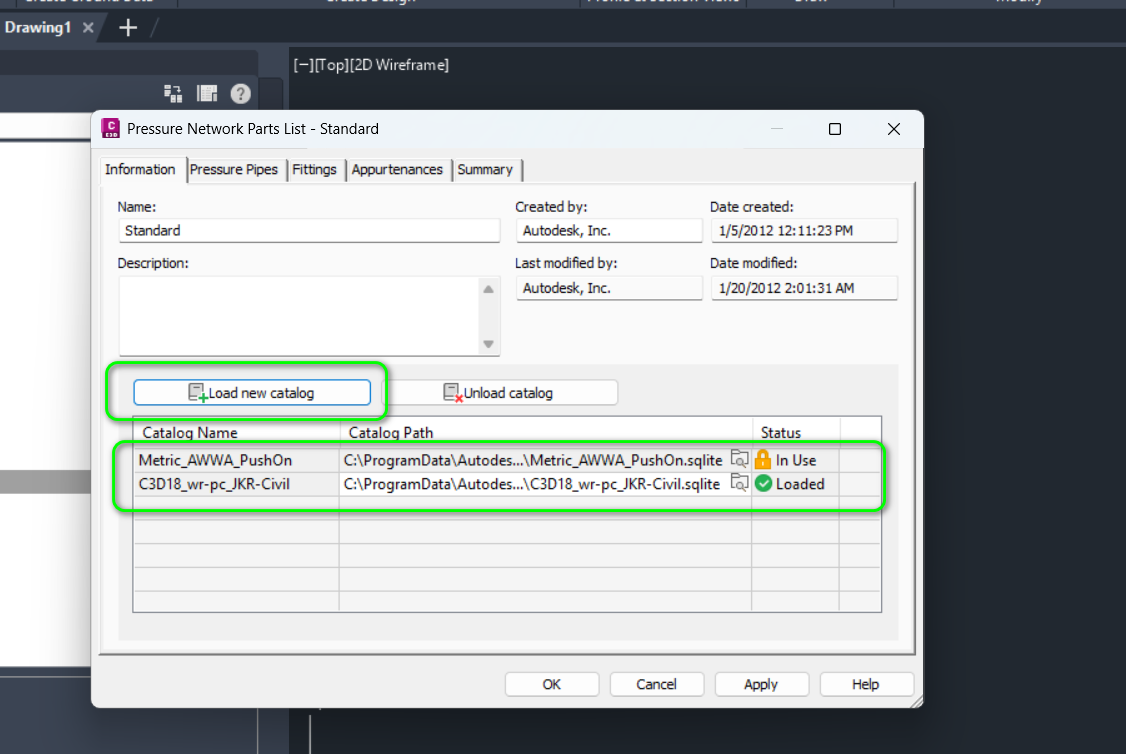
Once completed, you will be able to load multiple catalogs into a single Parts List within a drawing. Unfortunately there is no C# equivalent way of doing this, yet.
To add new materials/pipe/fitting/appurtenance size to the Pressure Pipe (or Fitting or Appurtenance):
- Click on the Pressure Pipe tab.
- Click Add Material.
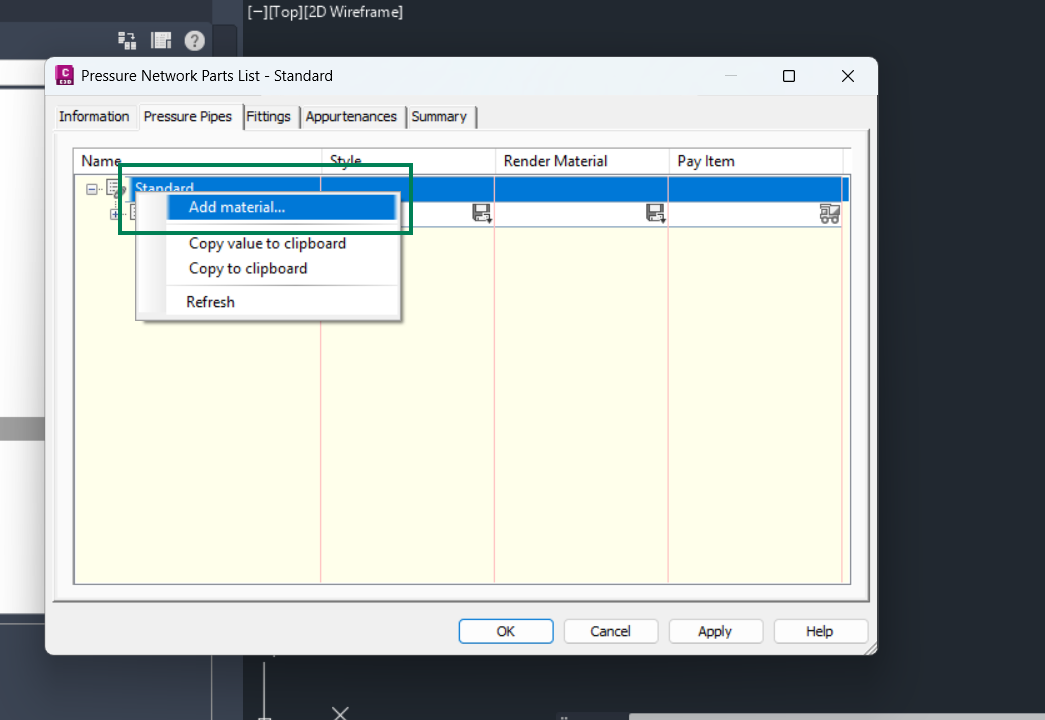
You can then choose Pressure Pipe materials from multiple catalog sources, as shown below:
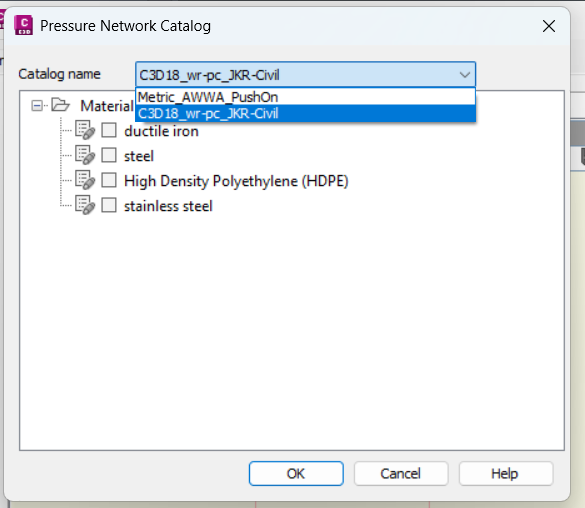
After making your selection, click OK. The related Pressure Pipe Sizes will now be available in the drawing for use via the Swap Pressure Part operation.
Gotchas #
Similar to the gravity network, the pressure network catalog must be fully available on the machine to properly use the Pressure Pipe/Fitting/Appurtenance sizes. For more details, refer to this post.


