Motivation #
This is to explore the behavior of Label Sets in Section Views, which is not properly documented by Autodesk and can behave in unexpected ways depending on how you access the setting.
Similar concepts and operations shall apply for Label Sets in Profile Views.
Label Sets vs. Band Sets #
There are a few ways to annotate a Section View. One is to use a Band Set and Bands, which basically function as table rows in a Section View. We explored this in our post: Use Section Data Band Style to show Grade Breaks in table row for a Section View.
Another way is to use Label Sets, which allow you to annotate critical information directly on top of the Section Line you select. A meaningful Section View usually includes multiple Section Lines, for example, one representing the elevation of the Existing Ground surface and another for the Road Datum surface. This allows you to compare the elevation levels of different surfaces along the same alignment.
Label Sets in Action #
Here’s how a Section View with Label Sets looks:
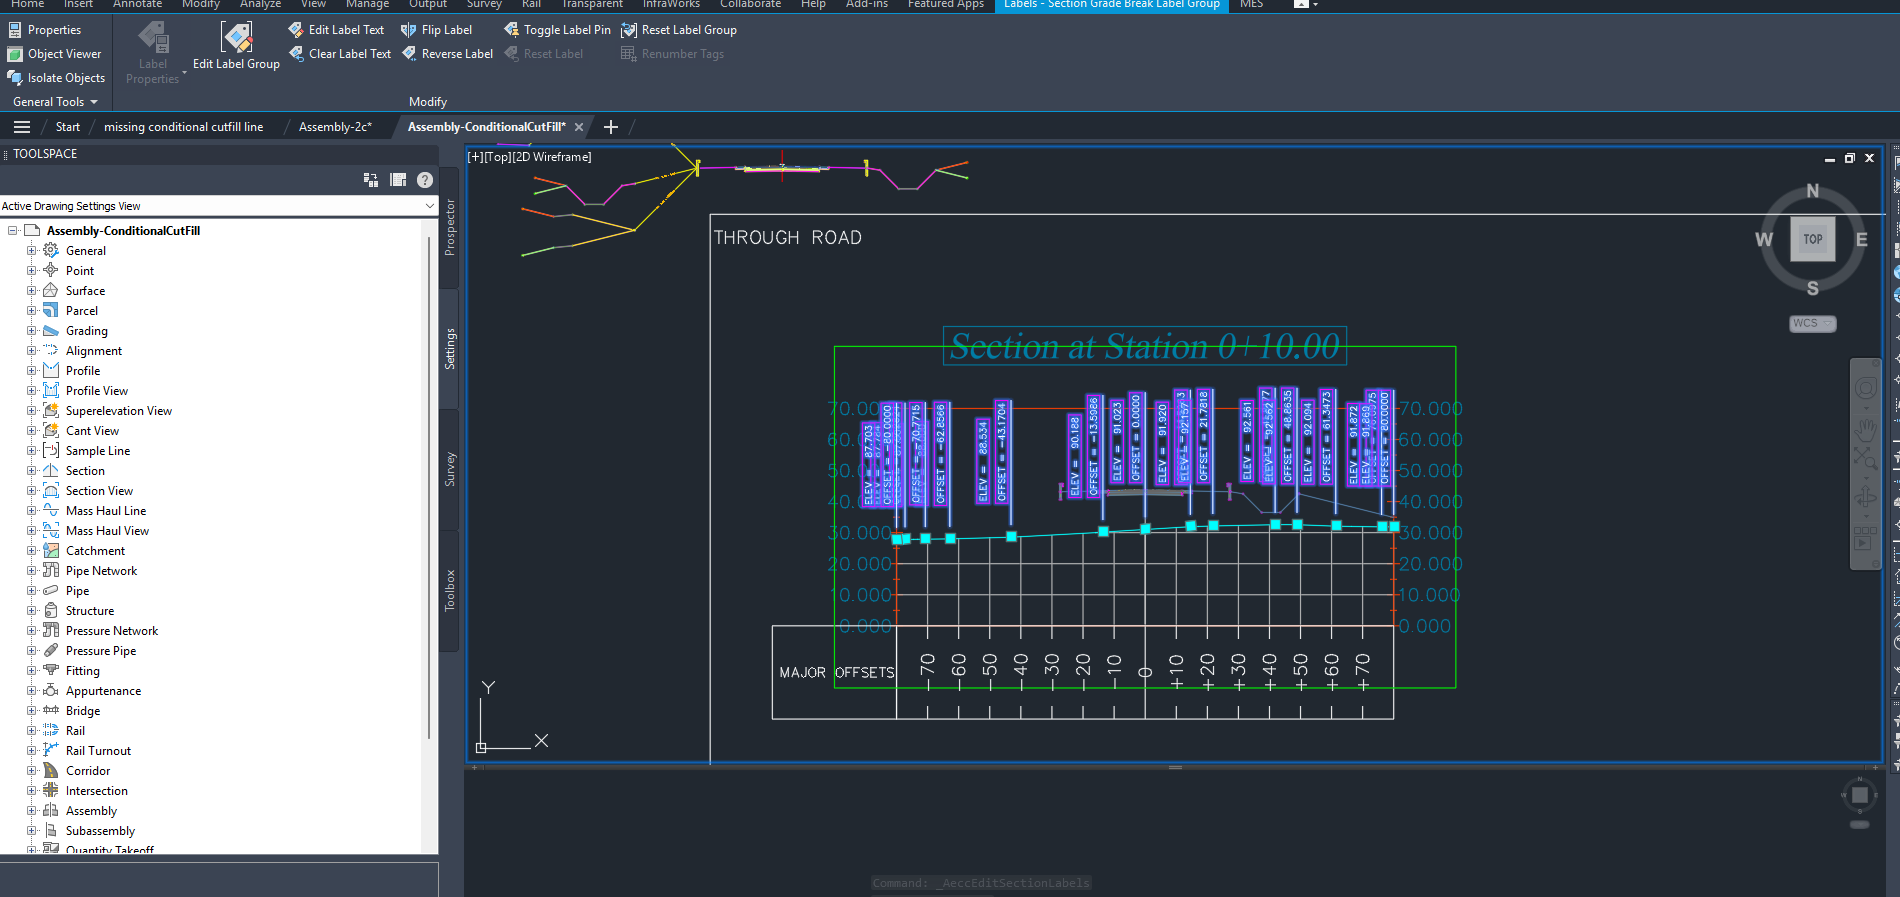
Note that at every interval where there’s a grade break (a change in line gradient), the Elevation and Offset values are plotted directly above the break point of the Section Line, in this case, the Existing Ground surface. You can choose to label other lines as well, but doing so for all lines can make the drawing cluttered due to overlapping labels.
The Master Source of Label Sets #
Before applying a Label Set to a Section View Group, you should know where it originates. The source is buried in Toolspace → Settings → Section → Label Styles → Label Sets, as shown below:
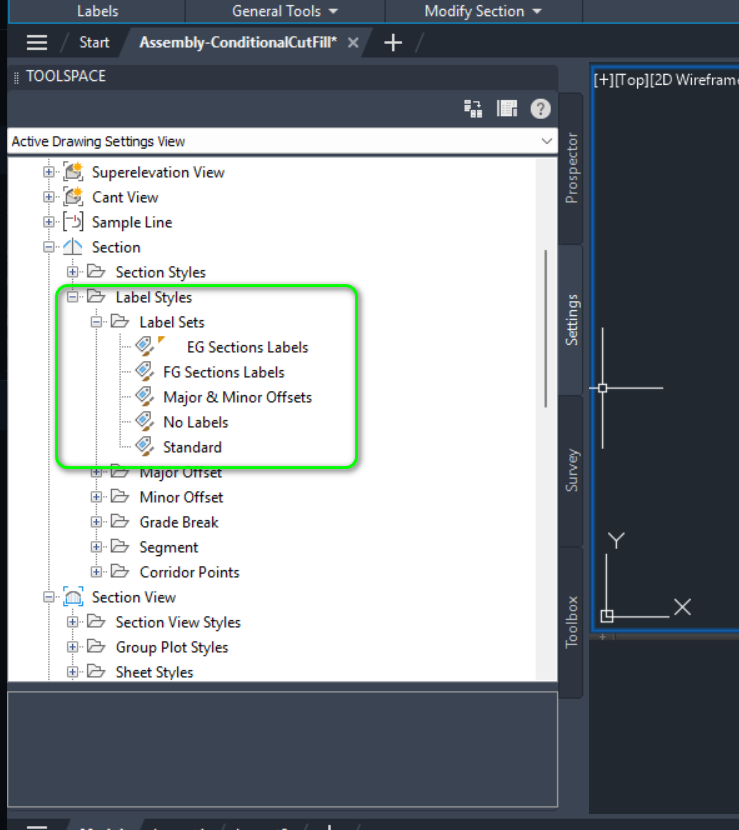
It’s unclear why Autodesk placed this under Section rather than Section View, especially since it applies to the latter.
Label Set Configuration #
To configure a Label Set, you must define one or more Label Styles (or Band Styles), as shown below:
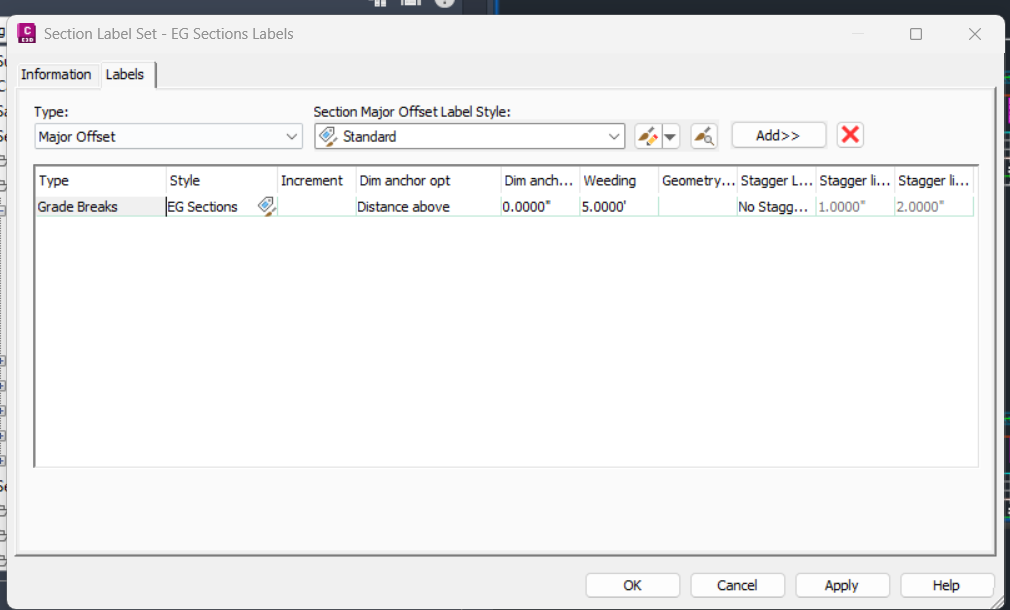
Since Label Set configuration is very similar to that of a Band Set (they share similar concepts), refer to our post on Band Set configuration. Once you’re in the Label Style Composer, the concepts—like different types (e.g., Grade Break) and data fields—are almost identical.
Assigning the Label Set (First Time) #
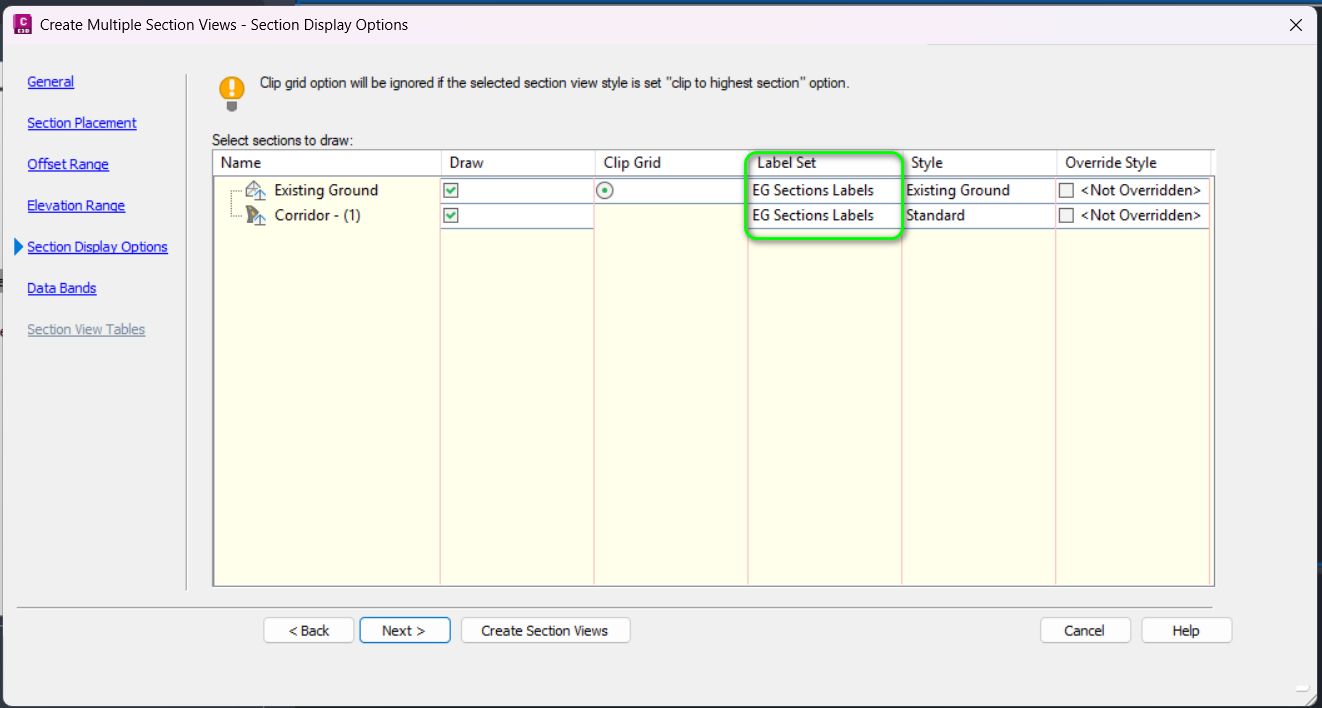
When you define a Section View, or multiple Section Views, you can assign different Label Sets to different Section Sources. In the example below, we assign the EG Section Labels set to both Existing Ground and Corridor – (1), though you can use a different Label Set for each.
Updating the Content of a Label Set #
Civil 3D lets you update Label Set content either for an individual Section View or for all Section Views in a group. The workflows are slightly different:
For the Entire Section View Group #
To update the Label Set across the entire group, click on a Section View entity in the drawing. Then right-click and select Section View Group Properties…
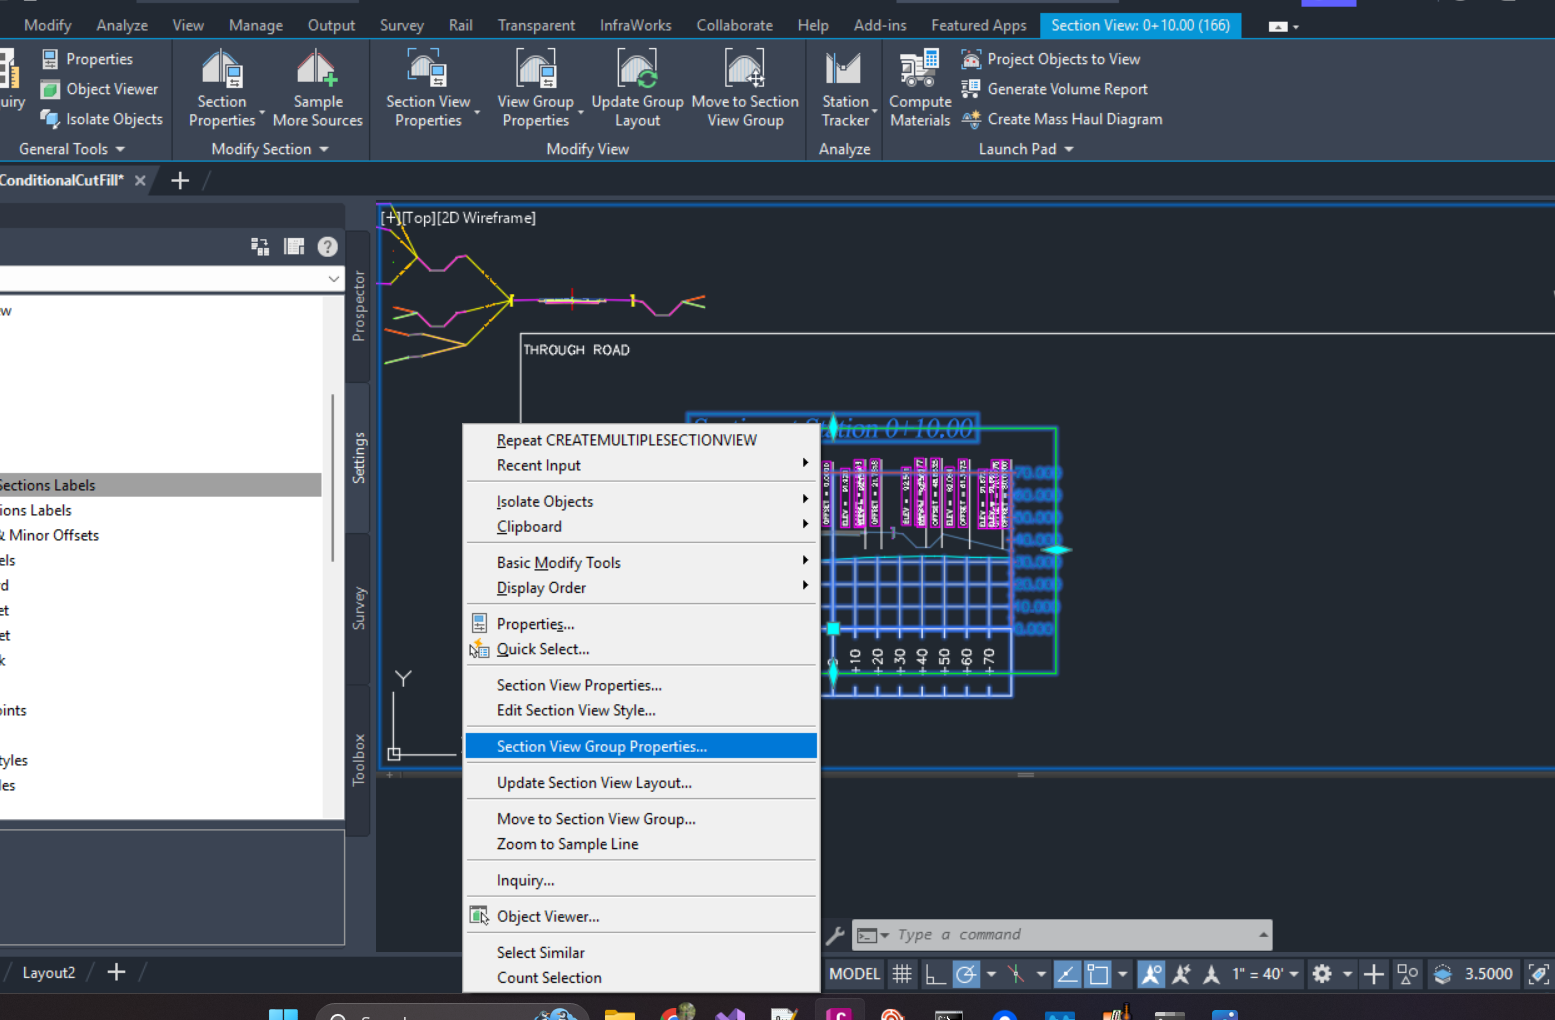
This opens the Section View Group dialog box:
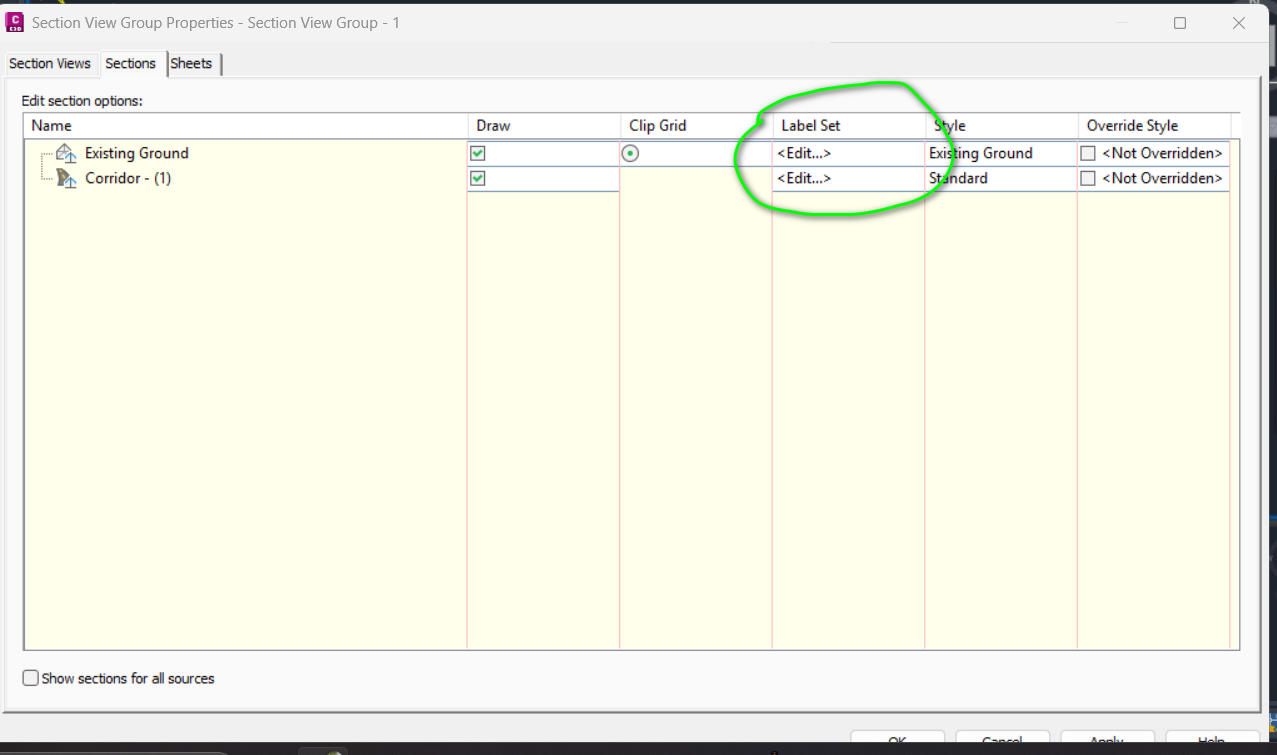
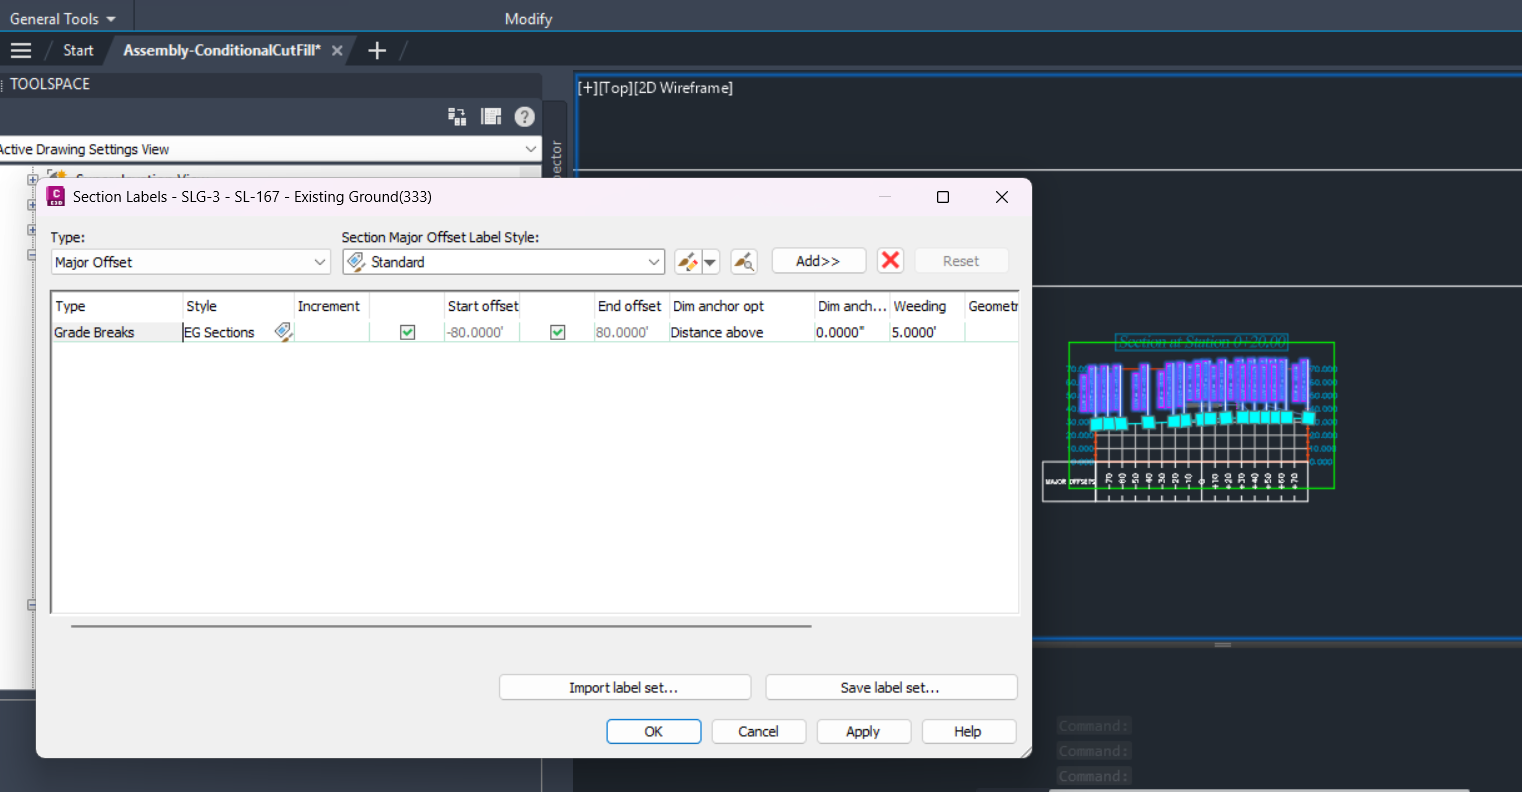
Here, you can either modify the Label Style within the Label Set for each Section Line, or replace the Label Set entirely.
Clicking OK or Apply will apply changes to all Section Views in the group.
For an Individual Section View #
To change the Label Set for just one Section View, do not click on the Section View entity itself. Instead, click on the Label Group entity:
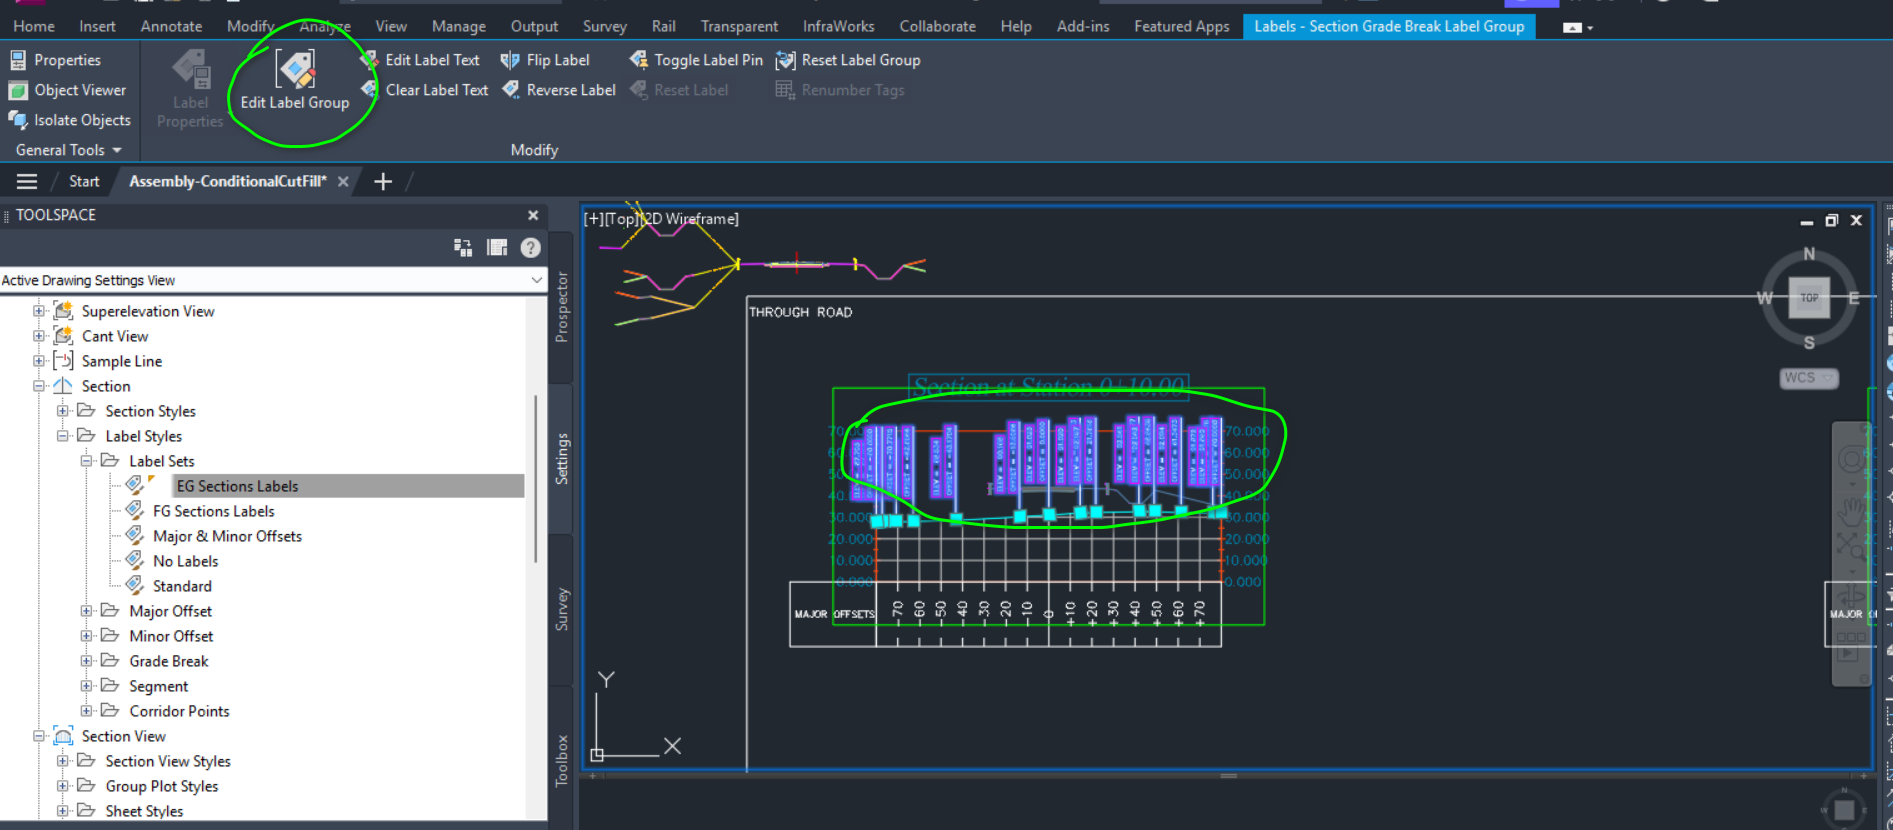
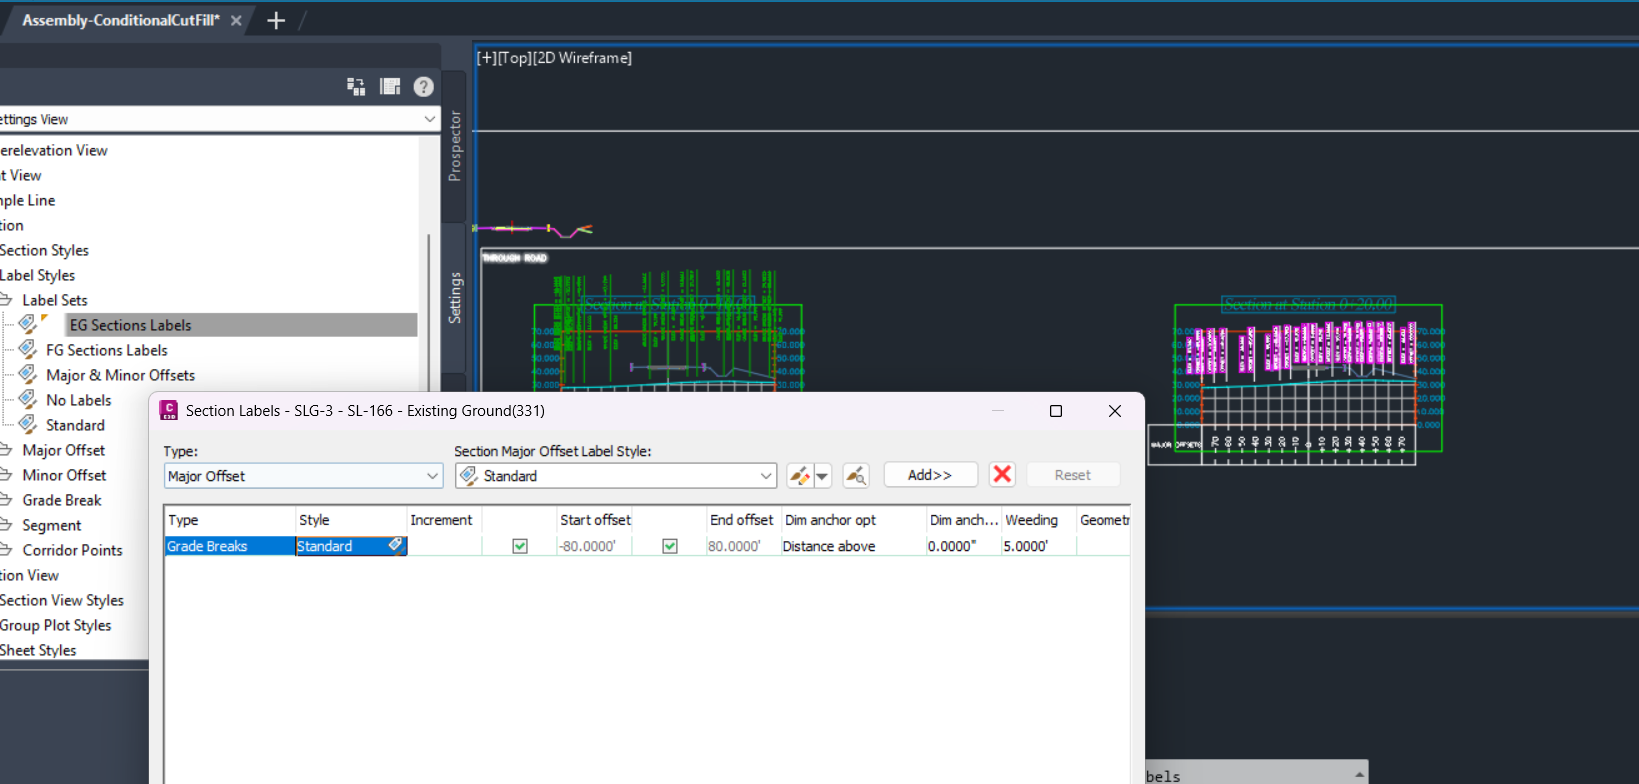
Then click on the Edit Label Group button in the ribbon. This brings up the same Label Set Properties dialog box as before, but changes made here will apply only to the selected Section View.
This is demonstrated in the following images, where two different Section Views have distinct Label Styles:
