
Motivation #
Coming from AutoCAD background, Civil 3D may seem familiar and complicated at the same time. This guide is written for those who have AutoCAD background, but want to quickly grasp the concept of Civil 3D so that they can be productive immediately.
The relationship between Civil 3D and AutoCAD #
Civil 3D is inheriting from AutoCAD codebase by building features on top of it. This means that whatever that you have in AutoCAD, you will automatically get it in Civil 3D. The converse is not true.
The upside of this design approach is that you are getting a lot of AutoCAD features for free, such as command line, the powerful entity editing functions and so on.
The downside is that a lot of features that you don’t actually need in AutoCAD will also be available in Civil 3D, which contributes to its bloatedness. And because you can’t remove those features away– they occupy prime screen state such as the top corner ribbon tab and buttons, you will have to rely on other UI controls to navigate around.
Before we can talk about how to work with Civil 3D, we need to first define two terms: CAD Objects and Civil Objects.
CAD Objects #
CAD objects refer to the objects that are native to AutoCAD, that you can get even with only vanilla AutoCAD installs.
Examples include 1D objects such as lines, arcs, 2D objects, and also 3D objects such as Mesh.
You can always access the properties of a CAD object by right clicking on it, and choose Properties menu item. The thing that “binds together” the same category of objects is called “layer”. Objects with the same layer will always have the same color, same transparency level and same for other appearances characteristics ( unless they were overridden at individual object levels)
Civil Objects #
Civil objects are the objects that only make full sense in Civil 3D. A civil object can be composed of multiple CAD objects. Just like how a road alignment is more than just the alignment line itself, but it also consists of the labels attached to the alignments , such as the stations, the line, curve and spiral information. All these things must be considered together in order to constitute a meaningful Civil object.
Because of this, a single layer isn’t sufficient to bind together all the similar civil objects, you will need a Style, or a Set Style. Read here for more information about the difference between layer, Style and Set Style.
All the civil objects will just appear as cad objects in AutoCAD. This is quite misleading as some might use AutoCAD to open up Civil 3D files ( unhelpfully, Civil 3D files have exactly the same DWG extension as normal AutoCAD files), and then complain about why they are not getting Civil 3D objects and features.
How to navigate them #
Right click command #
When you right click on an object in Civil 3D, regardless of whether it’s a CAD object or a Civil object, it will always have CAD properties, accessible via the Properties menu item.
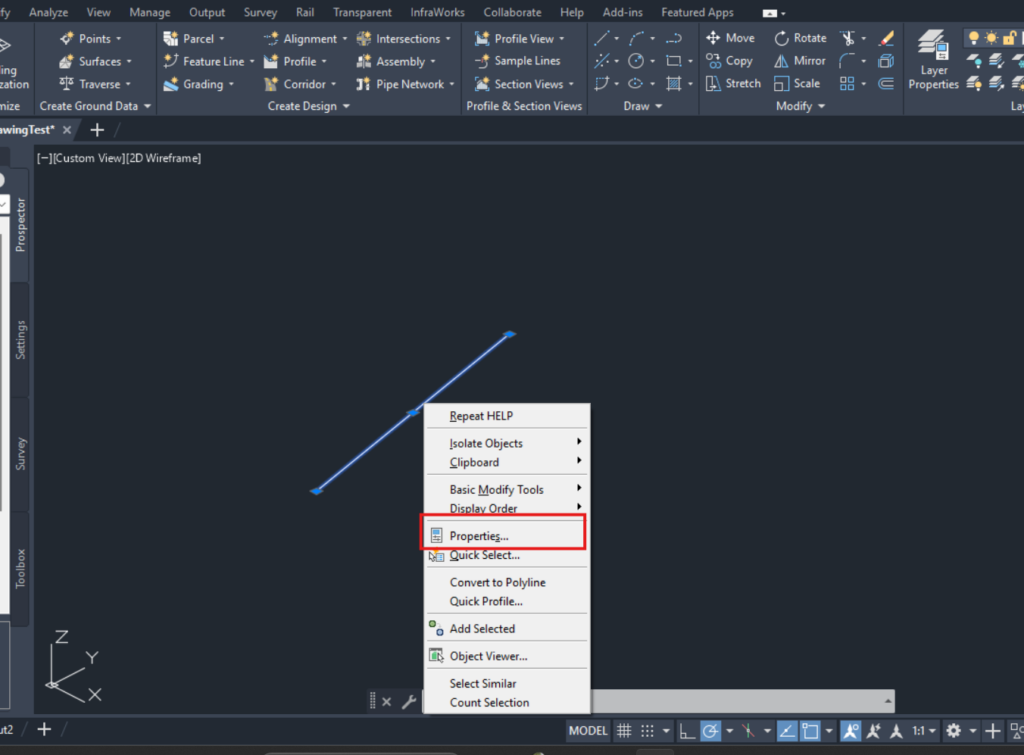
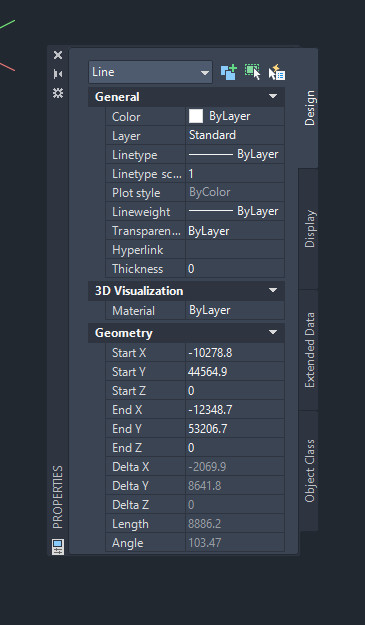
All that you will get is a (non-blocking) modeless dialog box showing all the properties for the AutoCAD object
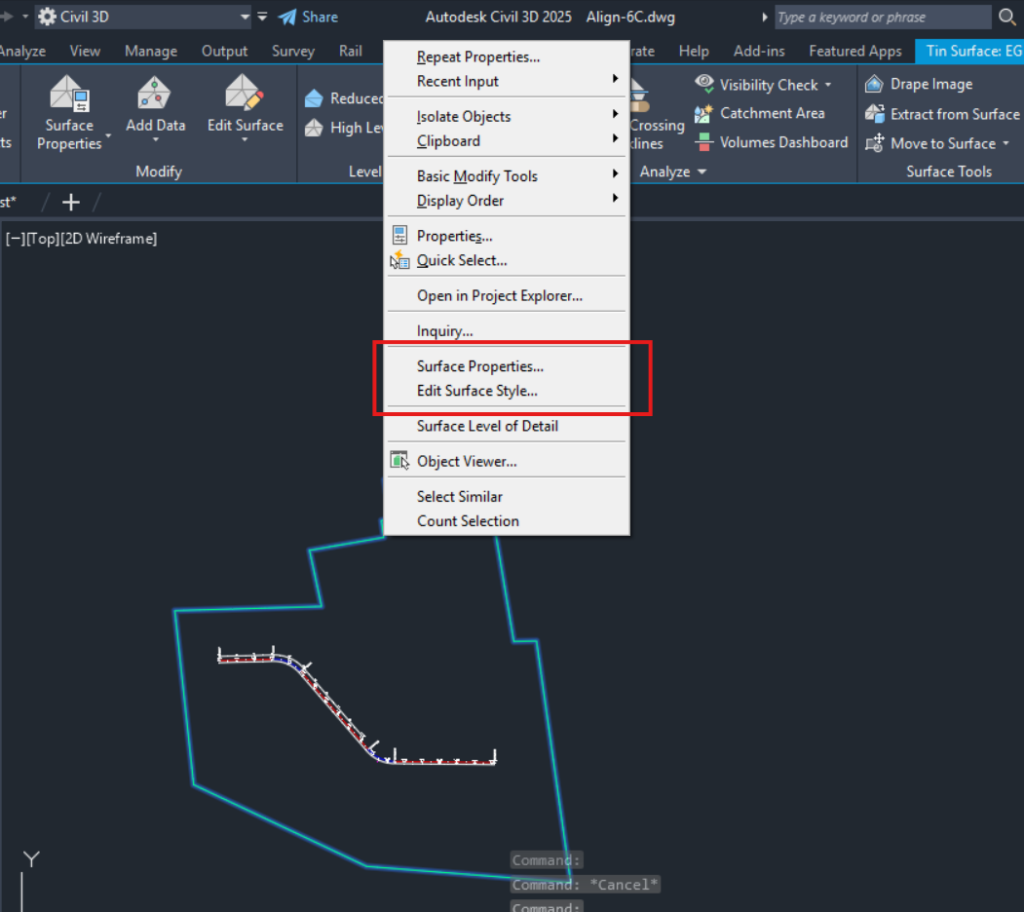
But for Civil objects, it will have an additional menu item, %CivilType% Properties, such as Surface Properties, and also the related styles, such as Edit Surface Style. From here you can access civil related properties and styles.
ToolSpace->Prospector #
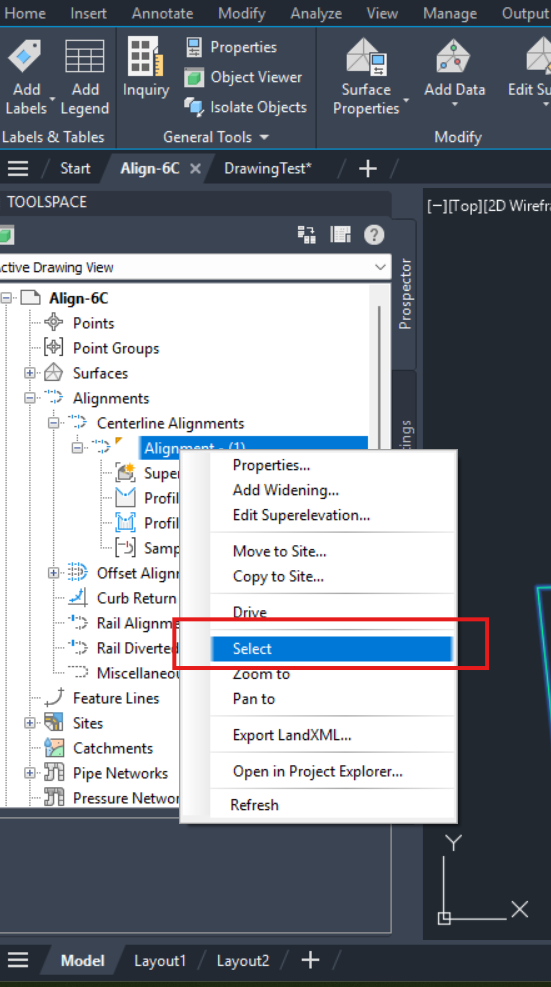
Additionally, you can always access the civil objects via Prospector at the ToolSpace ( which is usually located at the left hand side of the Civil 3D), under appropriate Civil Type such as Surfaces, Alignments, Feature Lines and so on.
Those objects appear as tree items under respective Civil Type. You can then right click on them, and choose Select to activate it. Once it’s activated, it will have a Contextual Ribbon Tab pertaining to that Civil Type appearing on the Ribbon Tab menu.


The contextual ribbon will have more options for you to operate on the Civil object
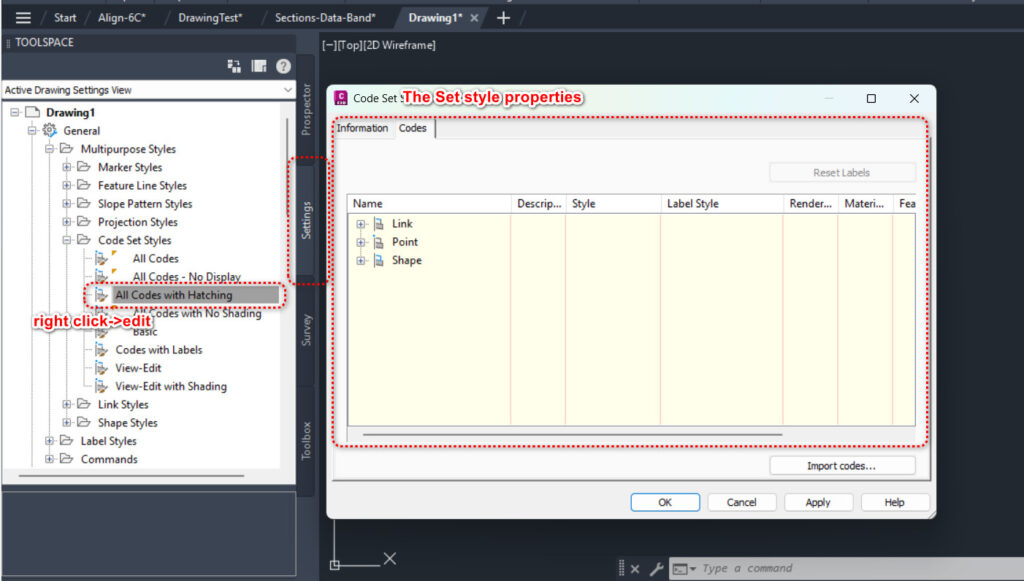
ToolSpace->Settings #
We have already seen how we can edit the layer, the Styles/Set Styles by right clicking on the entity, but there is a central place that you can access and edit the Styles.
The Settings tab on the ToolSpace is just another convenient way to access all the styles in one single place. You can click on the individual styles and edit it.

My passion is in sharing knowledge — Civil 3D or otherwise– with the world.
I’m also the benevolent dictator for life at MES Innovation Sdn Bhd.


